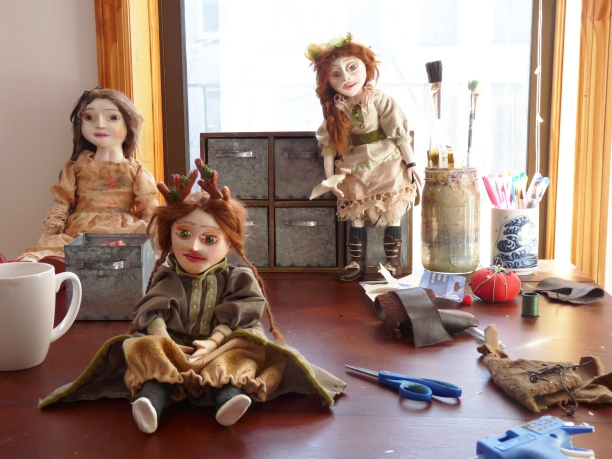
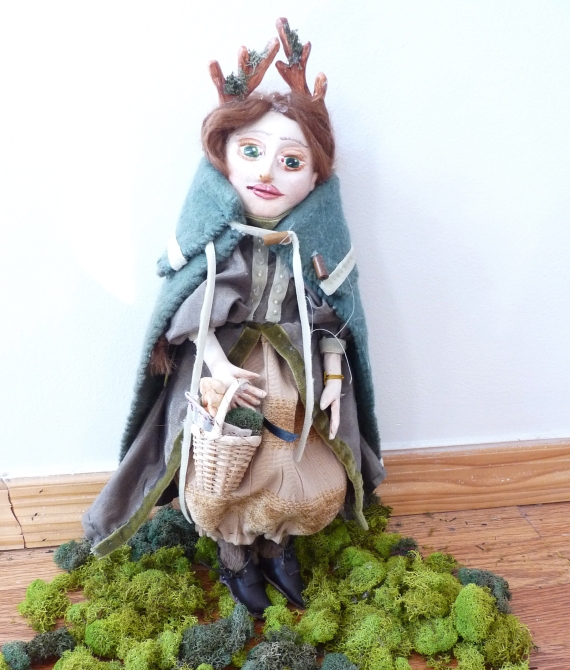
This past week I added the final touches to Flora and Fauna, my first all-Paperclay art dolls. These sisters were so much fun to make, and I learned a lot through sculpting them that will help me with future dolls!
Flora and Fauna are sisters born from the forest. Flora loves the forest best in the spring, when she can gather wildflowers and herbs beneath the green boughs, while Fauna haunts the misty winter paths, listening to the secrets of the trees and the hush of the snow.
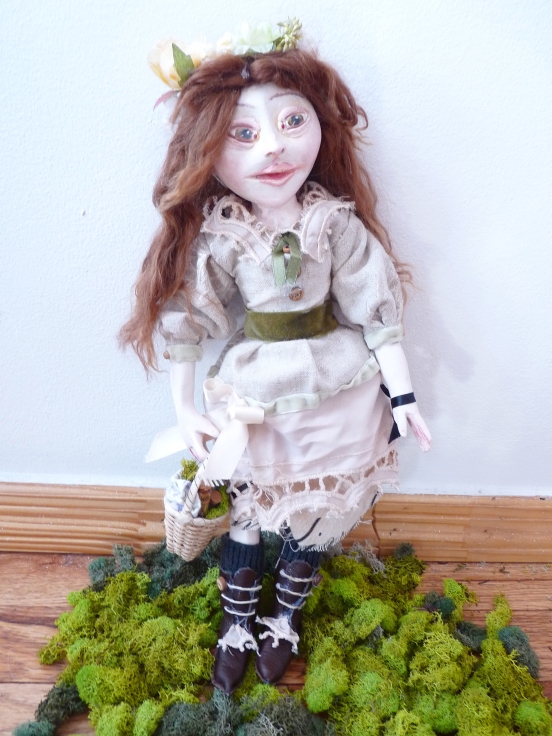
Each doll is about 14 inches tall and jointed at the shoulders and hips. They both come with a removable cloak and a tiny basket of treasures.
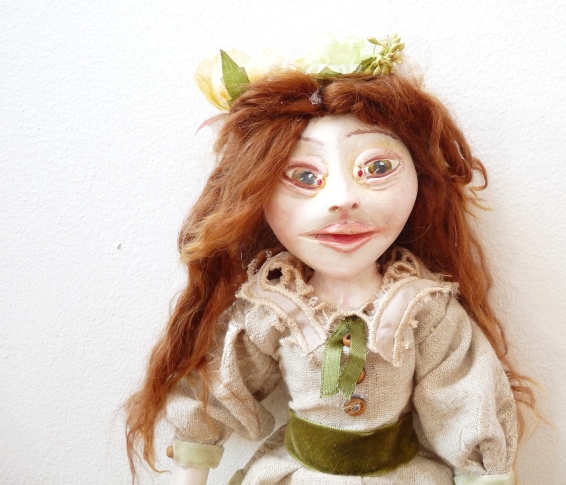
Flora
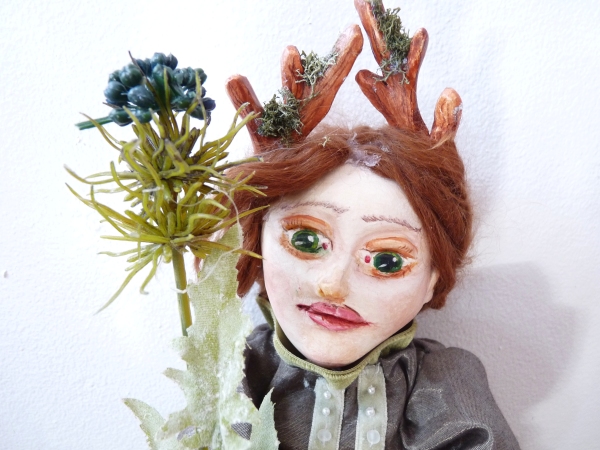
Fauna
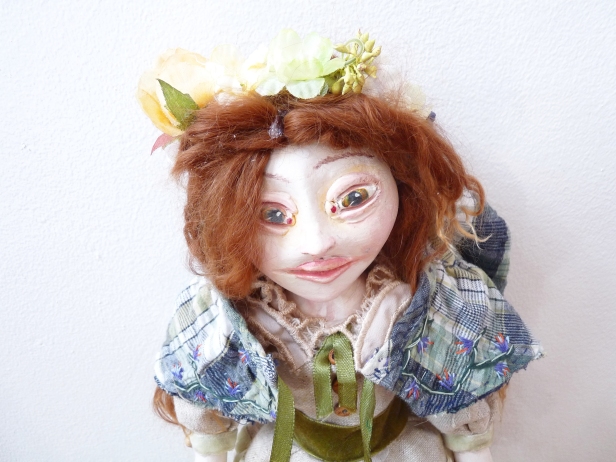
Flora has loose, wild brown curls and wears a miniature flower crown. Her Victorian-inspired dress is hand-stitched from materials including tea-stained linen, warm beige silk lace, green satin and velvet ribbon, and wooden buttons. Her removable plaid cloak is lined with moss green silk and hand-embroidered with tiny vines and purple flowers. The embroidery took me much longer than expected – it required several layers of thread for the vines and flowers to stand out from the plaid background. Flora also wears two tall leather boots, green wool socks, and a tiny key charm on a black ribbon.
Flora in her flower crownFlora’s dress and shoesFlora’s hand-embroidered cloakFlora’s accessories
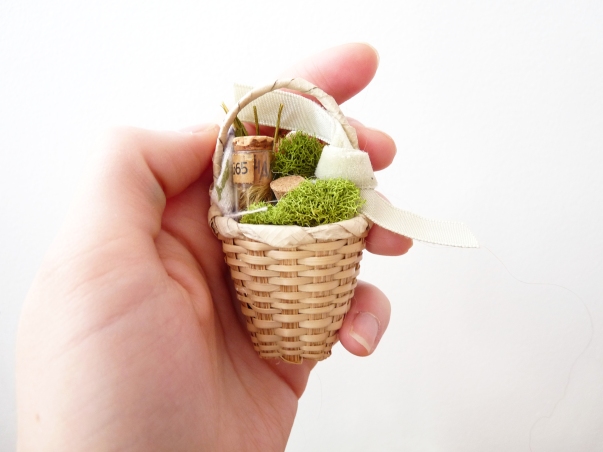
Flora carries her little wicker basket to store the items she collects from the forest floor. Inside are two miniature glass vials of moss and seeds, a bundle of herbs, moss, and a tiny hand-stitched napkin with a pattern of purple flowers.
Flora’s miniature basket
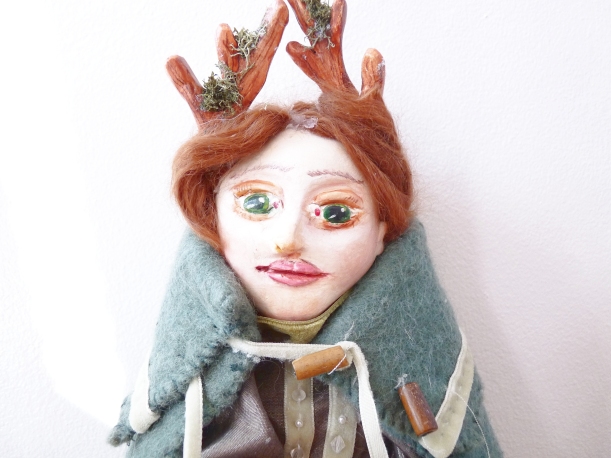
Two little antlers, fuzzed with moss, peek from Fauna’s soft braids. Fauna’s dress was inspired by drawings of Rackham fairies, and is hand-stitched from moss green silk, green velvet ribbon, sparkling seed beads, and engraved metal buttons. Fauna’s warm woolen cloak has been tea stained to give it a weathered look, and is decorated with velvet ribbon and wooden toggle buttons. Underneath her thick gold underskirt, Fauna wears two tiny, pointed, high-heeled leather and fur boots. These were the first boots I’ve ever made with heels!
Fauna’s antlers
Fauna’s dressFauna in her winter cloak
A partridge charm is wrapped around Fauna’s wrist on gold thread. Her tiny basket contains a miniature hand-stitched napkin patterned with dancing hedgehogs, moss, and two little sculpted and painted bread loaves to feed her hungry forest friends.
Fauna’s accessories
Flora and Fauna are now available in my Etsy shop, here. Feel free to message me through WordPress or Etsy with any questions about price, availability, or layaway.
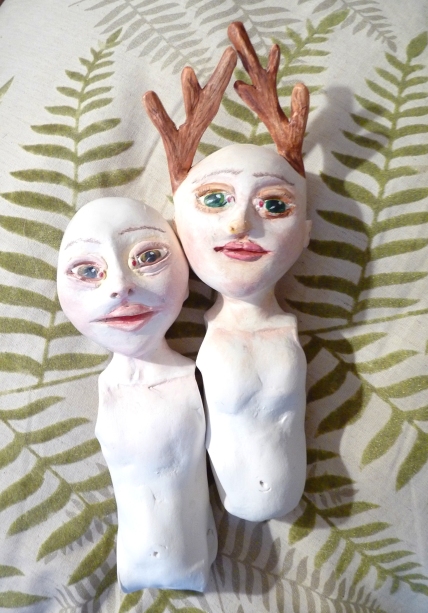
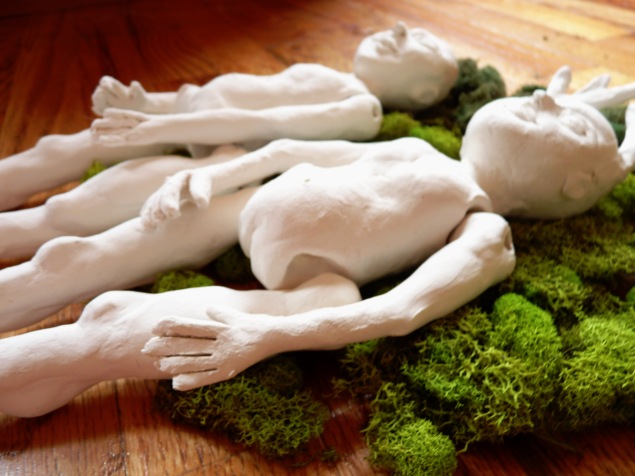
This weekend I took advantage of the snowstorm we’ve had here in Brooklyn to make some progress on Flora and Fauna, my first fully sculpted art dolls.
I’ve sanded them down from the rough sculpts you can see here, and have moved on to painting and sealing! Painting is always my favorite part of doll making – it’s when the doll’s faces are complete that they really start to come alive for me.
Flora and Fauna are painted in watercolors and then sealed to protect them. Once sanded and sealed, their light Paperclay bodies are surprisingly strong! For Flora, I went with peach and pink tones, while Fauna is painted in browns and yellows.
Next I’ll move on to stringing them, and adding their wigs and clothing. Stay tuned for pictures of the finished dolls!
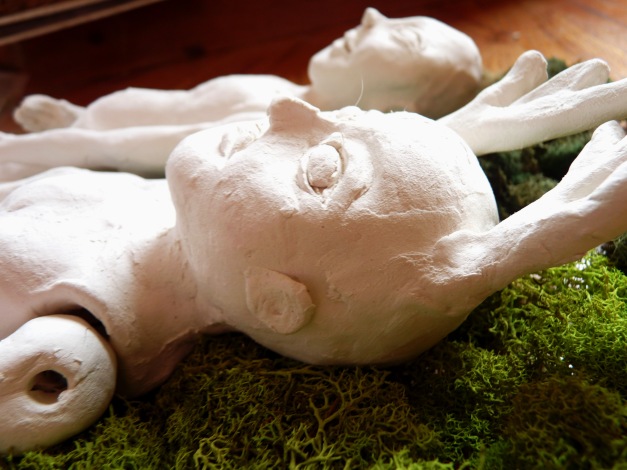
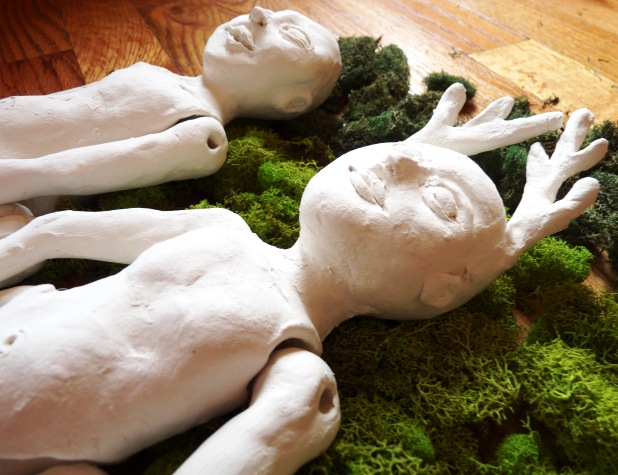
I’ve been taking a short break from my Neverland project to work on something new – my first full-sized dolls made entirely of Paperclay! Though I’ve already been making Paperclay mini dolls and full-sized dolls with Paperclay heads and limbs, these are my first to have Paperclay bodies with jointed arm and leg sockets.
Flora and Fauna are sisters born from the forest. Flora, with her flower crown, is the happy summer child, while Fauna, with her antlers and heavy wool cloak, is a daughter of the winter.
Flora and Fauna are still in that rough stage between sculpting and sanding, but I’m very pleased with how they’re turning out. Though I struggled at first with making their bodies and limbs thick enough to be proportionate, I’ve been building them up in layers and I think they’re finally fully filled out.
After sanding and painting, I’ll work on stringing their bodies together. I’m still figuring out what I’m going to use to string them – for my mini dolls I use simple thread, but for these I’ll need something much stronger!
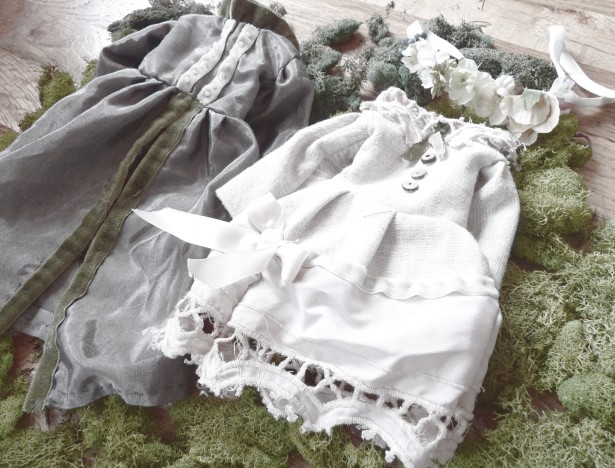
When finished, each doll will wear tiny coordinating dresses, which I’ve been working on between sculpting while waiting for the Paperclay to dry, and will carry similar wicker baskets.
“His eyes were of the blue of the forget-me-not, and of a profound melancholy, save when he was plunging his hook into you, at which time two red spots appeared in them and lit them up horribly.”
Last month I blogged about my new project, a group of dolls based on Barrie’s characters from Peter Pan, and shared a first glimpse of my Peter doll. This month I want to show you some work in progress photos of my Tinkerbell and Hook!
WIP – Tinkerbell
Tinkerbell is “life size;” an all Paperclay doll just six inches high. Tinkerbell is described by Wendy as “lovely,” and yet I wanted to retain some of the rustic English impishness of the fairies and goblins of Victorian fairy tales. Tinkerbell has a sharp face, large feet, and knobby knees and elbows, but when she’s finished, she’ll also have beautiful butterfly wings and wear a long gossamer gown.
WIP – Jas. Hook
Hook was so much fun to design and sculpt! I’ve had an old vintage brass hook thrown in with my art supplies for a very long time, and when I decided to create characters based on Peter Pan, I knew I had finally found a use for it!
Hook’s head and hand are sculpted from Paperclay, and he has a handstitched jointed body. I wanted to give him a classic hooked nose and chin, leering smile, and hooded eyes, and had a lot of fun mixing the perfect shade of “forget-me-not blue” to paint his irises. Of course, I also couldn’t forget the red dot in each of his pupils!
Hook’s hook
Hook looks quite a bit less dastardly before receiving his wig and mustache, which will be made from long black curls of mohair. When he’s finished, Hook will also wear a coat made of black velvet and red silk, and a large feathered hat.
Stay tuned for a first look at my Wendy doll, and to see all of the finished dolls!
Due to the popularity of my post on sculpting a full-size Paperclay doll, I decided I’d post more dollmaking tutorials. These 5-6 inch mini dolls are fun to make and require only a moderate amount of skill with Paperclay. Thanks to their small size, they also don’t require a large work space or long time commitment, unlike my larger dolls. Don’t let the length of the tutorial intimidate you; you can easily sculpt the body in an hour, and complete each additional step whenever you have a few minutes of free time!
Dollmaking Supplies:
Wax paper or plastic tablecloth
Water jar
Small package of Paperclay (available at most craft stores)
Simple sculpting tools (available at most craft stores) or ice pick
Soft cloth
Sheet of sandpaper
Small round paintbrush for details, larger flat paintbrush for sanding and sealing
Watercolors and/or watercolor pencils
Matte ModgePodge
Needle and thread
Four small round beads (with holes large enough for your needle to pass through)
Low-temp glue gun
Scissors
A few strands of yarn, roving, or wool locks (I buy my roving and wool locks on Etsy from stores selling spinning supplies)
Fabric scraps and trimmings
Step 1: Sculpt the Paperclay Doll Body
First, set up your work space by covering it with your plastic tablecloth or a couple of sheets of wax paper, and laying out your Paperclay, water jar, and sculpting tools. Remove any rings and bracelets before beginning to sculpt, to avoid covering them in Paperclay!
Pinch off a ball of Paperclay about large enough to sit in your palm, and knead it to the correct consistency, adding water a little at a time from your water jar, if necessary. You want your Paperclay to be pliant and slightly “bouncy,” but not so wet that it smears easily.
Half your ball. Roll one half into a log shape about 2 1/2 inches long. Add or remove clay if necessary. Pinch the log about 1/3 of the way from the top, using your fingers or your sculpting tools, so that you have a torso and a round head separated by a neck. Be sure not to make your neck too thin, or it will break. Use your hands or sculpting tools to mold your head into an egg shape with a pointed chin, and to give your torso a more human shape. Use your thumbs to give your face indentions where you want your eyes to be (imagine the eye sockets of a skull). This should also give you a slight ridge in between, which will serve as the bridge of your nose.
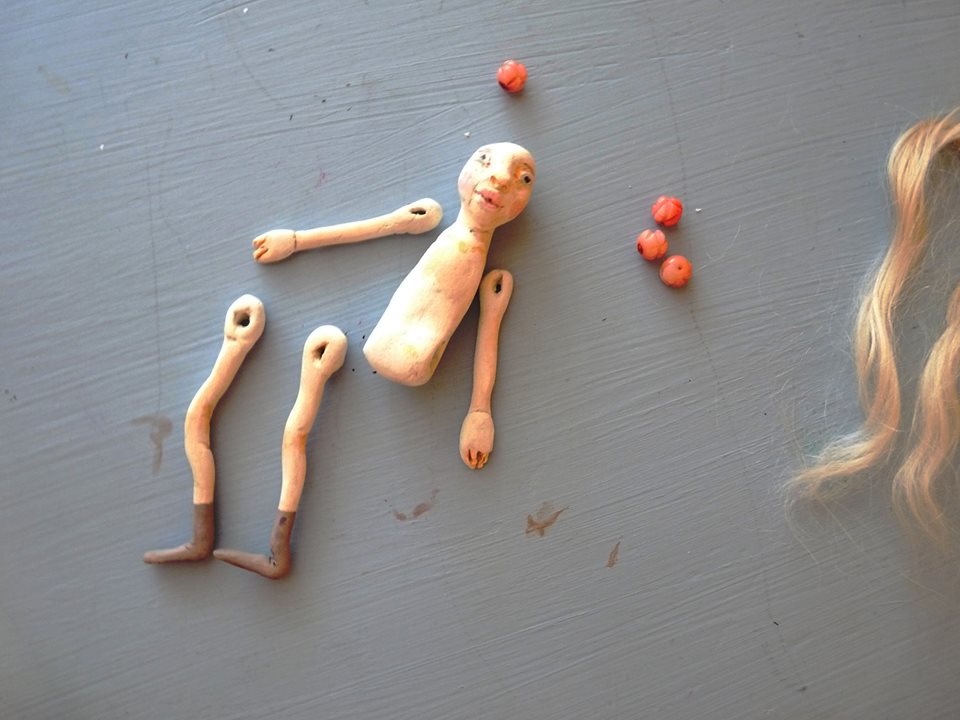
Use your sculpting tools or ice pick to poke holes through your body, running from shoulder to shoulder and hip to hip. (Refer to the picture below if you are unsure where these should go.) Make these holes large enough for your needle to easily pass through.
Complete your face. Make four tiny balls with Paperclay, each about the size of the head of a pin. Gently set one ball each where you want your eyes, the ball of your nose, and your mouth. Use your thin round metal sculpting tool or your ice pick to press eyelid lines across each of your eyes, poke two nostrils in your nose, and press a smile line through the middle of your mouth. If desired, use a similar process to create ears.
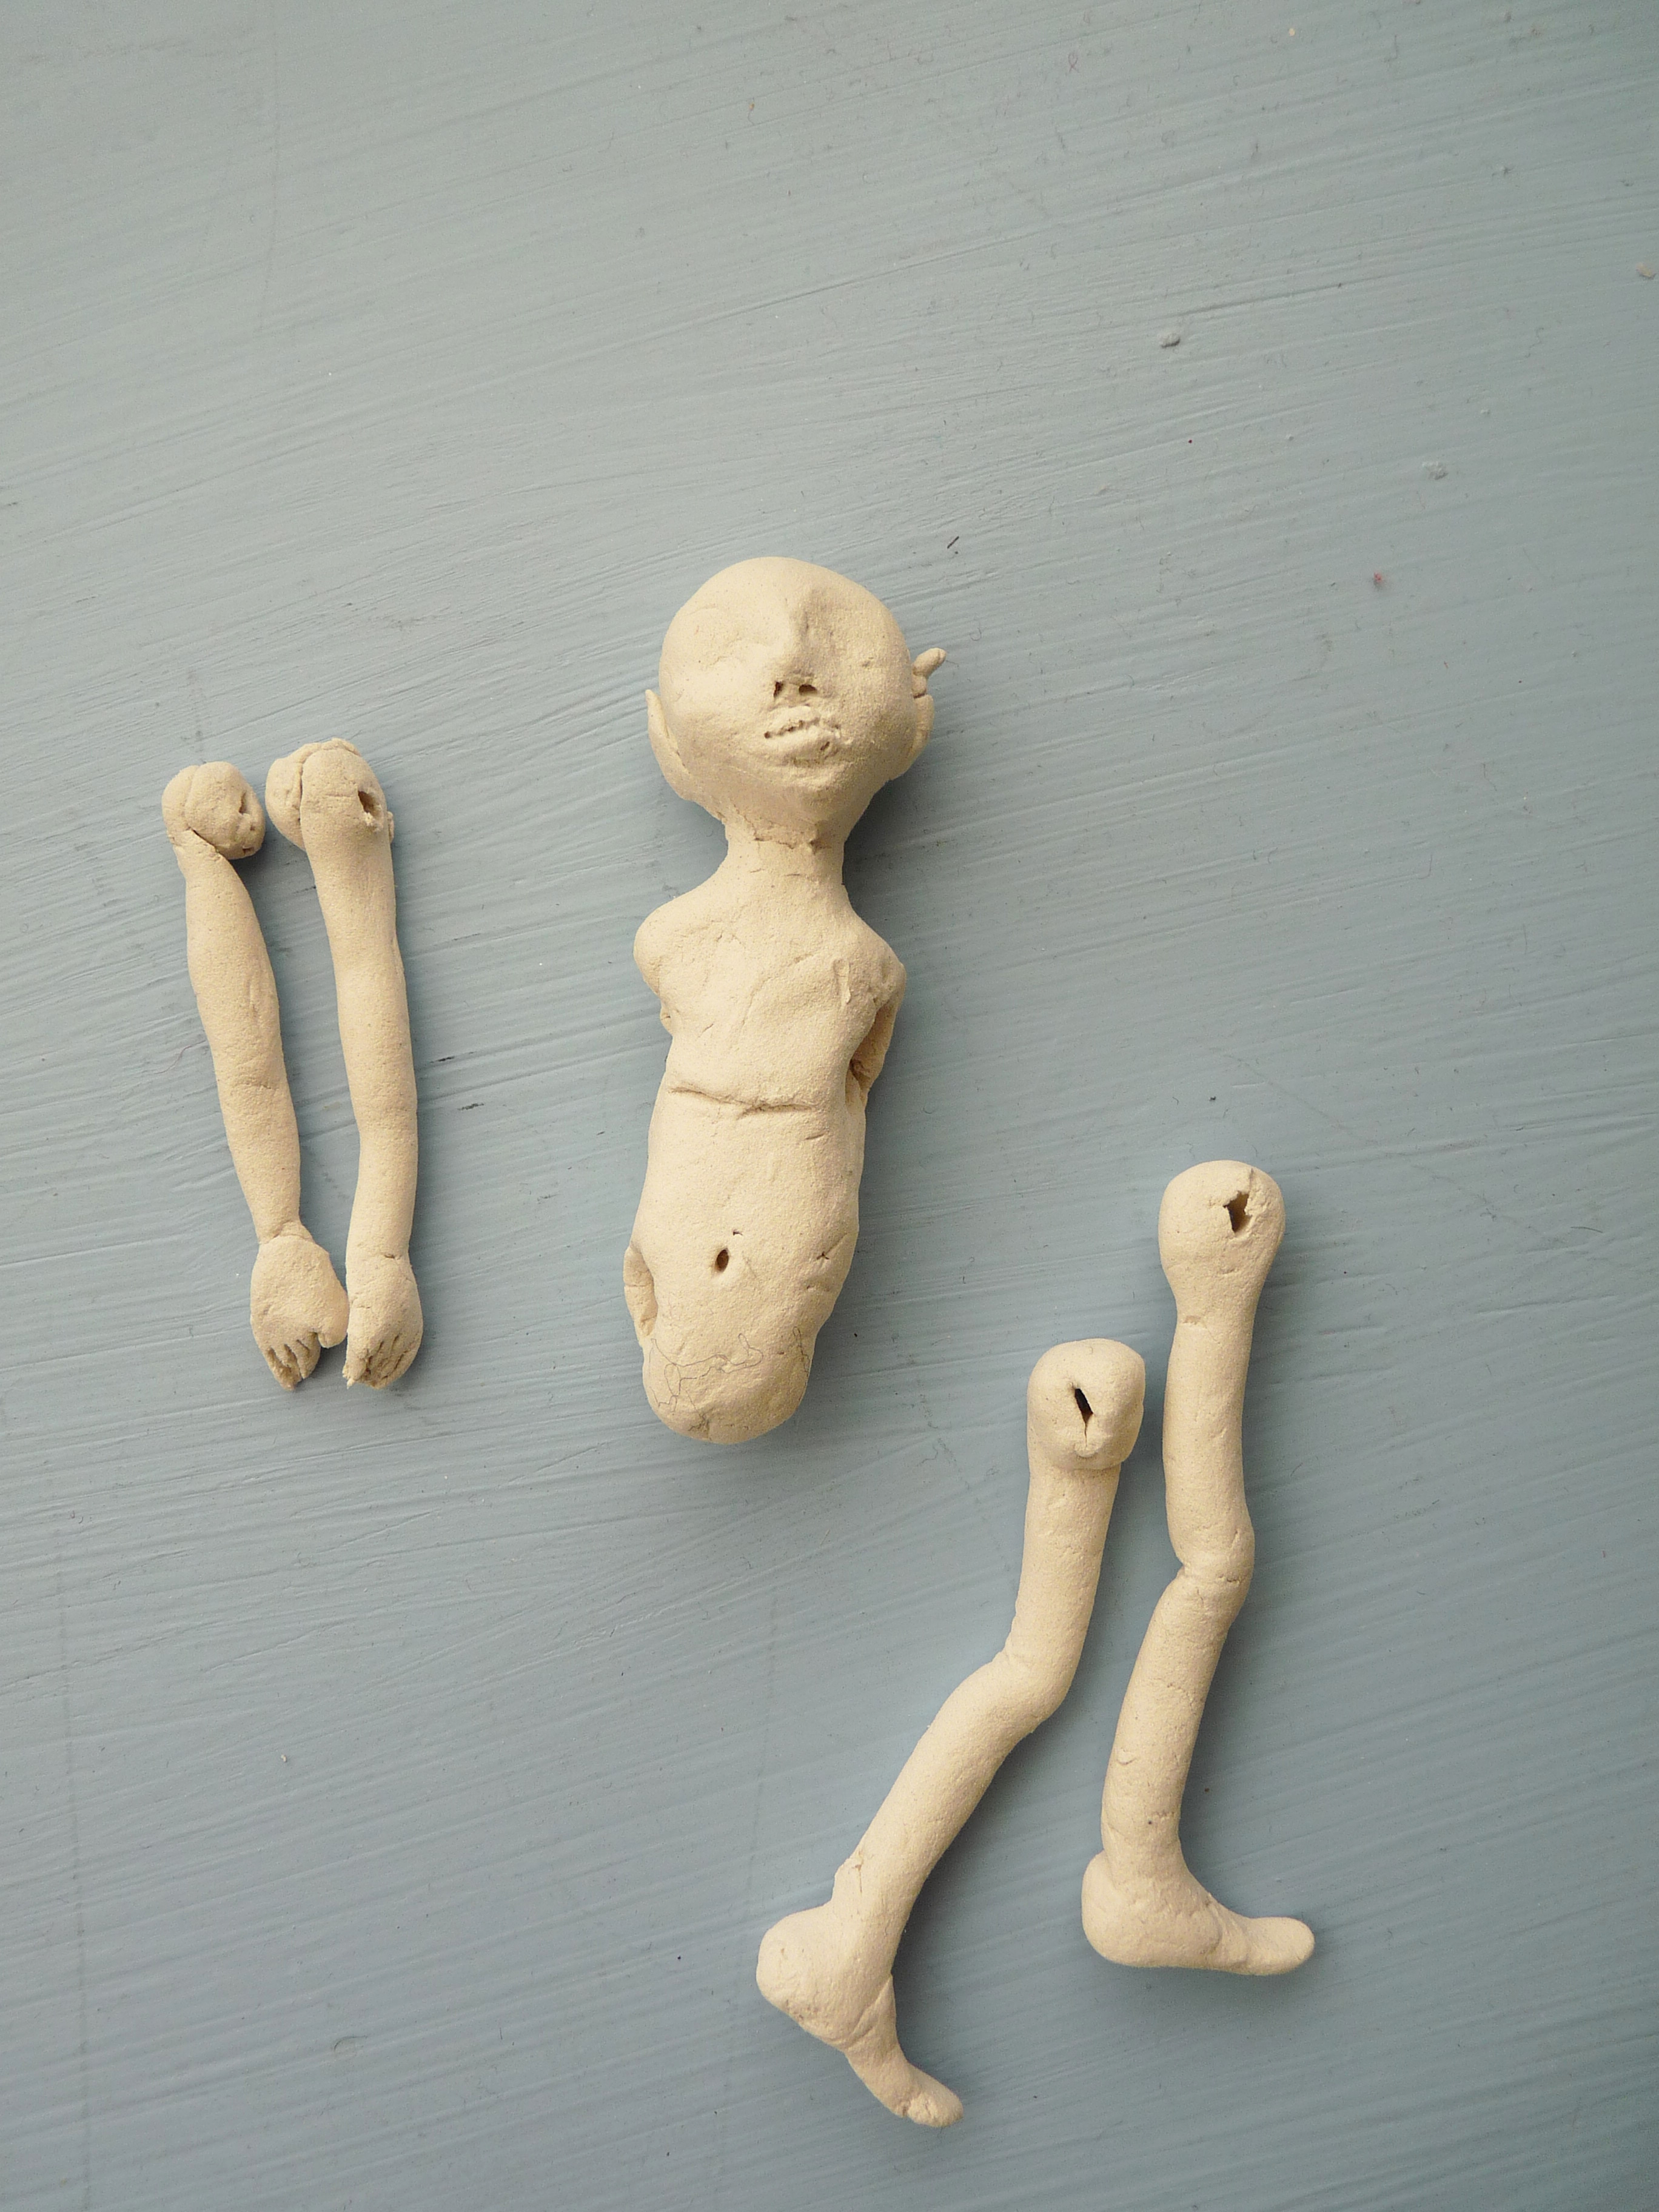
Set your finished torso and head aside, and roll the remainder of your clay into a thin “snake” the width that you want your arms and legs. Pinch off pieces to serve as arms and legs, measuring them against your torso if needed to determine the correct length. Arms should generally be about 2 1/2 inches long, and legs (which need to be long enough to include a foot) 3 – 3 1/2 inches. Create a bump to serve as elbows and knees in each of your arms and legs by slightly folding them in the middle. Flatten one end of each of your arms to create hands. Use your thin metal sculpting tool or ice pick to draw lines to suggest fingers. Bend about 1/4 – 1/2 an inch of each of your legs up to create feet, pinching your “ankle” thinner if needed. Finish your arms and legs by poking holes through the front of your arms at the shoulder, and the sides of your legs at the hip, large enough to pass your needle through. Again, refer to the photo below if you are unsure of the direction to poke the holes.
Allow your finished body to air dry for about two days. Don’t worry if it looks a little rough, as the next step will help with this!
Your finished sculpted body should look something like this.
Step 2: Sand, Paint, and Seal your Paperclay Doll Body
When your body is dry, cover your work space again and set out your water jar, larger paintbrush, sandpaper, and soft cloth. Use your sandpaper to gently sand the body, being careful not to press too hard (which could snap the limbs) or sand away your facial features. The sanded Paperclay should have the appearance of white stone. When sanded, use your dry paintbrush to brush the excess clay dust from the body, and then dampen your soft cloth and use it to gently burnish and smooth the body. Allow any parts of the body that became wet to thoroughly dry before moving on.
Tip: If any part of your body breaks during this process, a hot glue gun or superglue can be easily used for repairs.
When you’re ready to paint your body, cover your work space and grab your water jar, small paintbrush, and watercolors. First cover your body with the appropriate flesh tint. It’s generally a good idea to make this a much lighter tone than you think you’ll need to. Then, use a darker tone of your flesh tint to create highlights around your eyelids, mouth, cheeks and chin, elbows and knees, hands, and feet. To paint your eyes, first paint the entire eye white, then, when dry, add a colored iris, and then, once dry, a smaller black pupil. To finish, dot your pupil with a tiny white highlight. Add thin lines for eyebrows, and darken your lips to the desired shade. Finally, paint shoes onto the feet of your doll. Some might find it easier to use watercolor pencils for these details.
Allow your doll to thoroughly dry before bringing out your matte ModgePodge and larger paintbrush. Gently cover your doll in a thin layer of ModgePodge, being careful not to let the ModgePodge collect in the creases of your doll’s face and fingers. Unless you water down your ModgePodge or use a wet brush, this should not smear your paint.
Allow the doll to dry again before moving on.
Painted and sealed doll body with beads for stringing and mohair for hair.
Step 3: String your Doll’s Body
When you’re ready to string your doll’s body, you’ll need the doll, a needle and thread in a color to match the doll’s skin tone, and your four beads. To attach the doll’s arms, first string one of the beads onto your needle and thread, and knot your thread around the bead to keep it from slipping. String your first arm onto the thread, and push it down against the bead. Then, pass your needle and thread through the doll’s body, pulling the arm tight against the shoulder. On the other side, string on the second arm, pushing it down tight against the shoulder, and then the second bead, pushing it down against the arm. Pass your needle back through the second arm, the body, the first arm, and the first bead, repeating as many times as necessary for you to feel that the limbs are secure, before knotting off your thread. If your limbs are a little loose, this is fine, as it will give them more freedom of movement. Repeat the same steps to string your doll’s legs.
Step 4: Dress your Doll
Gather up your doll, the materials you’re using for your doll’s hair and clothing, scissors, needle and thread (if desired) and your glue gun. Plug in your glue gun and allow it to warm up. While you’re waiting, plan out how you’ll arrange your doll’s hair, and trim it to a uniform length. Dolls of this size generally need only a few strands of yarn or mohair. Use your glue gun to attach the hair, folding the strands in half and attaching the fold to the doll’s scalp for a more natural look.
Use your cloth scraps and trimmings to dress your doll. This can be done entirely with your glue gun, gluing the clothing directly to the doll, or you can use a needle and thread to sew the outfit first if you like.
To create a dress similar to what’s shown in the picture below, you will need: fabric scraps, about a quarter yard of thin lace, a short length of ribbon, and a few tiny seed beads. Cut a piece of cloth the correct size to sew a skirt, and cut a length of lace the width of the skirt. Sew your lace to the bottom of the skirt, then fold the skirt over with the outside showing, and sew up the open side to form a tube. Turn your skirt inside out and put it on your doll, using hot glue to secure it at the doll’s waist. Create gathers by folding at the waist if desired. Cut another length of fabric twice the length of your doll’s upper torso and the right length to wrap around it. Fold the cloth in half, and using hot glue to secure it to the doll, wrap it around the doll’s torso, creating the dress’s bodice. For sleeves, cut two more pieces of cloth the correct length and width to wrap around your doll’s arms, and secure with hot glue. Add lace at the bottom for cuffs. Cut a length of ribbon the right length to wrap around your doll’s torso, and secure it with hot glue, using it to hide the join between the skirt and bodice. Finish the dress by gluing a line of seed beads down the front for buttons.
A finished mini doll: Sculpted, painted, sealed, strung, and dressed!
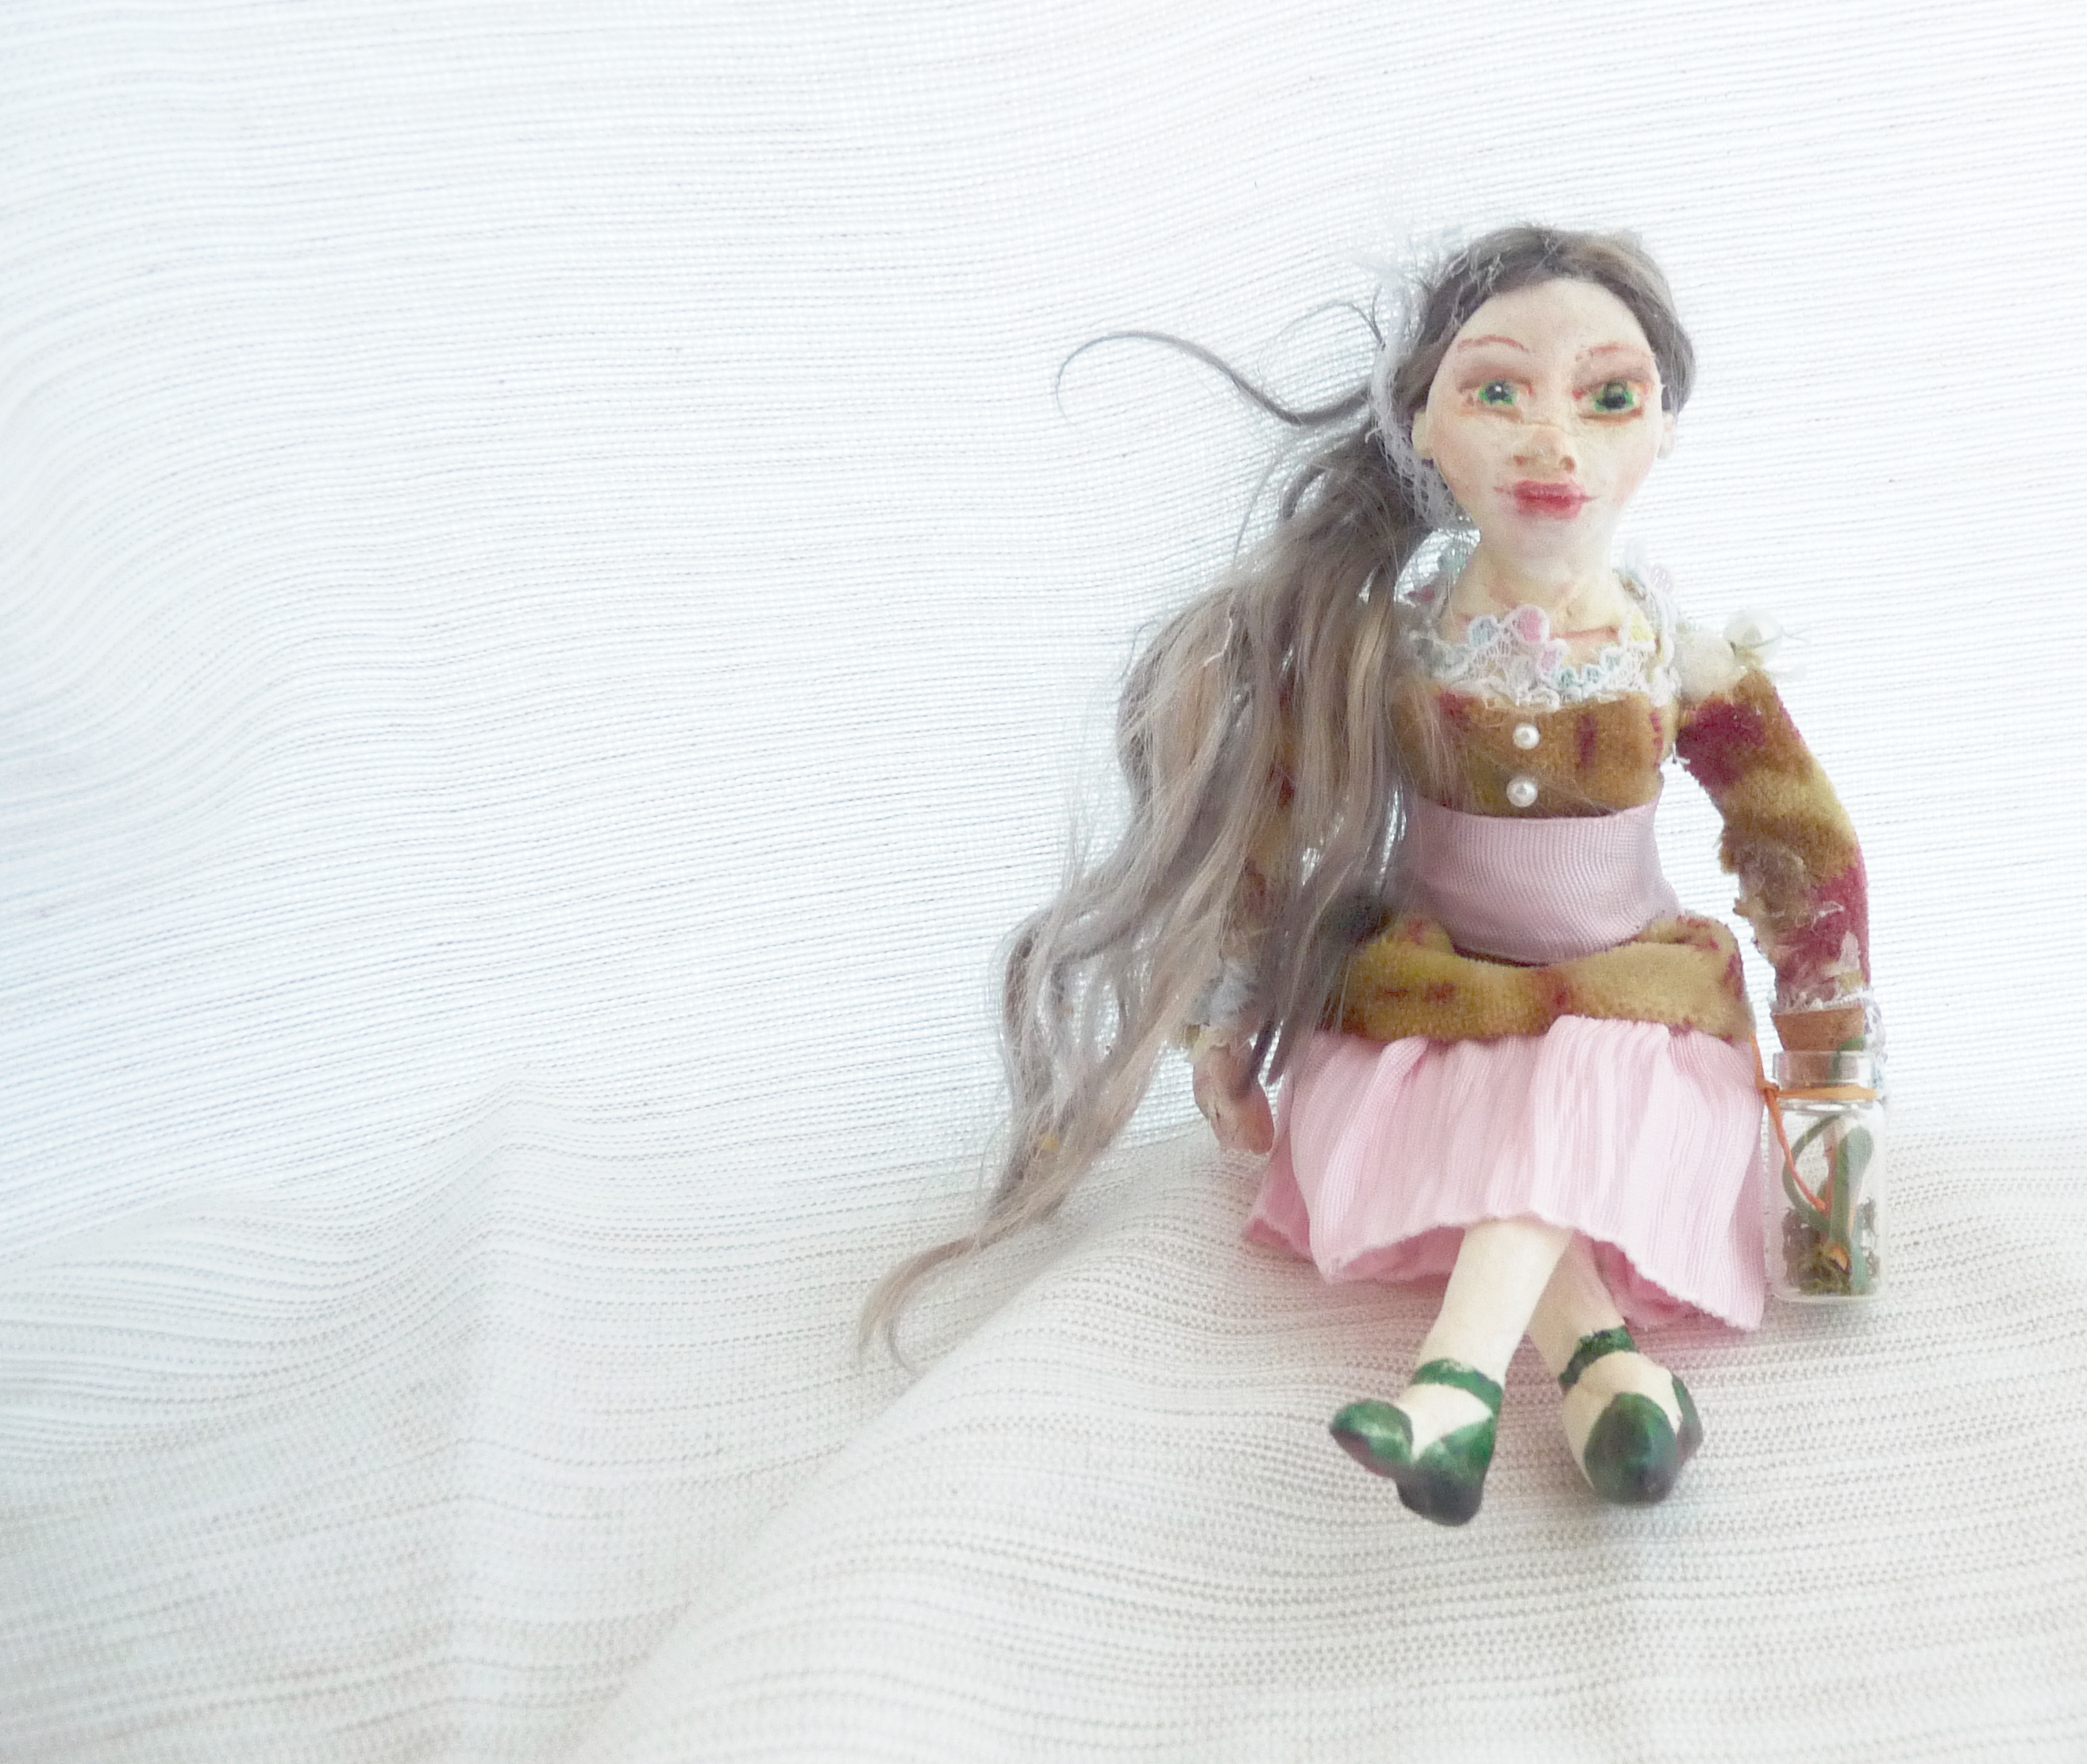
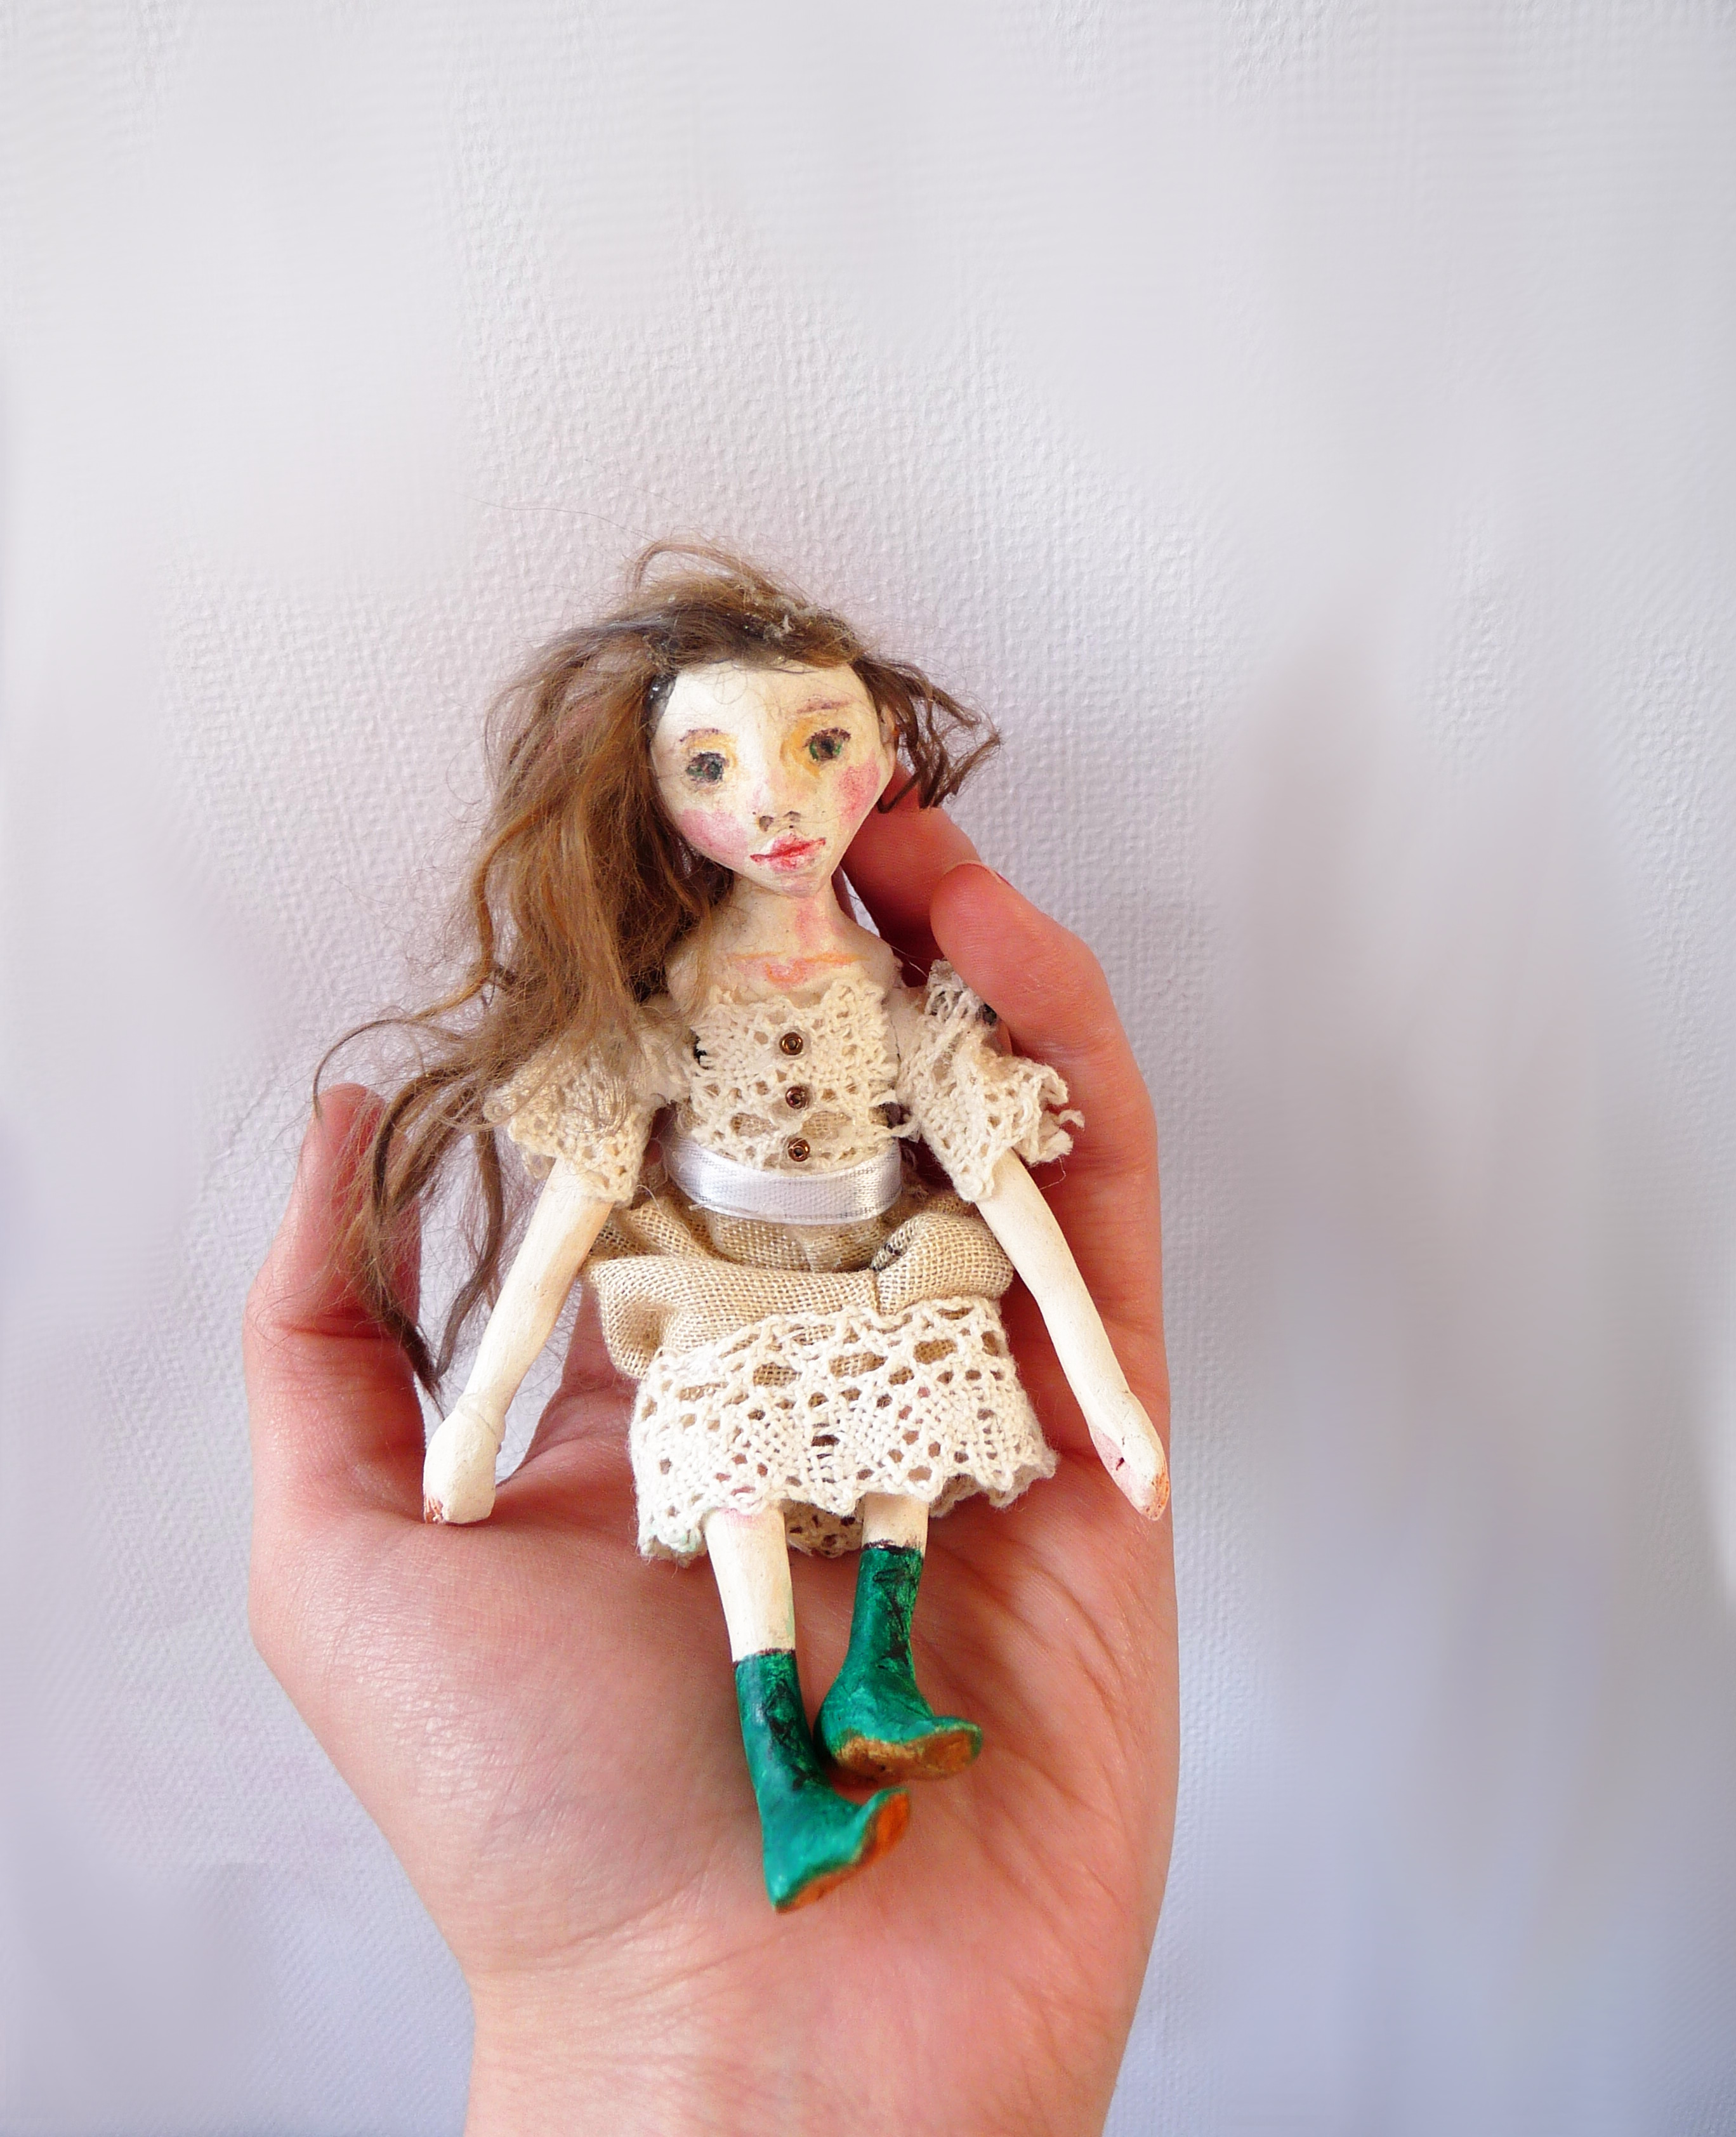
After successfully sculpting my first full-size Paperclay art doll, I thought it would be fun to try sculpting a miniature dollhouse doll with the remaining clay. I’ve always been fascinated by miniatures, but have had trouble sewing a miniature doll. Sculpting one was much easier!
Sculpting Poppy’s bodyPoppy’s body and limbs
Sculpting Poppy’s tiny face and elf ears was the hardest part! After she dried, and I sanded her smooth and jointed her limbs with thin wire and tiny beads. She can sit and raise her arms.
I painted Poppy with watercolors (I used watercolor pencils for the details), and used dyed Alpaca left over from my larger doll for her hair. Poppy’s tiny dress is made using tea stained linen and lace remnants from my Sonnet doll. Her teensy buttons are made from seed beads.
Poppy fits perfectly in the palm of my hand!
Poppy will be available in my Etsy shop very soon, although it may be hard for me to give her up!
Over spring break, I finally had some time to work on my paperclay art doll, September! The poor thing had been naked for quite a while, but now she has some clothes! September is based on the heroine of Catherynne M. Valente’s Fairyland books, a brave little girl who is carried by the Green Wind from her home in the 1930’s Midwest to Fairyland.
September wears a tea-stained cotton petticoat, edged in lace, over her bloomers. Wool socks will keep her feet toasty on her adventures.
September’s dress is based on that she wears in the second novel, a birthday dress cut-down and taken-in from one of her mother’s dresses, which, September decides, could almost be called orange, her favorite color, if you squint at it. Her dress is hand-sewn and dyed with tea and watercolors. I had originally dyed it closer to orange, but decided that the pinker color looked better with September’s lips and cheeks.
September also wears handmade red leather boots that I purchased from a seller of antique dolls on Ruby Lane. In Valente’s story, September loses one of her shoes, and I imagine the fairies giving her this pair of fantastic boots in return!
September is now almost finished! The last thing she needs is the Green Wind’s coat, which he loans her to keep her warm in Fairyland. I’m going to have so much fun designing and sewing it!
Over my Christmas break, I decided to try a brand new project – sculpting a jointed doll from Paperclay.
Even though I don’t have much experience sculpting, I’ve always wanted to try this. I decided to make the doll for myself, unsure of how my first attempt at sculpting would turn out. I based my doll on the heroine of Cathrynne M. Valente’s Fairyland books, September, a brave girl from the 1930’s in a homespun cotton dress and the Green Wind’s fantastic coat. As I made my plans before sculpting, I took inspiration from antique French Bru dolls and the Paperclay art dolls of Holli, an artist I admire.
Sketch in my journal for September
Initial sculpt of September’s head
When I began sculpting, I immediately fell in love! I love the way Paperclay feels, and how easy it is to use. In the past, I’d had a hard time with clay and Sculpy, but Paperclay was soft and flexible, and much easier. I loved the feeling of literally forming something with my hands, something that would carry my fingerprints. I spent over a week sculpting and re-working every part of my doll, which, with Paperclay, which softens with water, was easy to do!
After September was dry, it was time for sanding and carving, the most tedious and labor-intensive part of the process. But then it’s time for the really fun part – painting.
Painting September
Before getting started, I spent time with my watercolors mixing colors and testing them on a sheet of paper to make sure I got them right. I’d originally wanted to give September hazel eyes to match the brown hair I’d bought for her and the green coat she would wear, but as I played with colors, I decided to go with a purple -grey instead.
The painting stage was when September really came alive for me. Another doll artist I know has said that she doesn’t feel like her dolls are alive until she’s painted their eyes, and this is true for me as well.
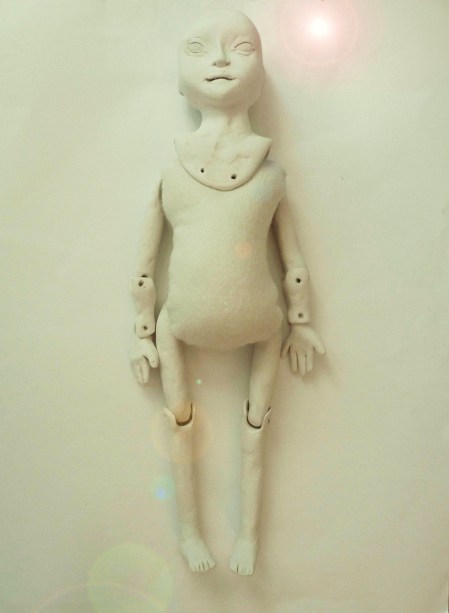
Painting September’s headSeptember’s face
After September dries from being painted, I’ll be stringing her and creating her wig. I decided to give her a cloth body that her head and limbs will be sewn to. Before painting her, I quickly arranged her together and snapped a photograph to see what she’ll look like.