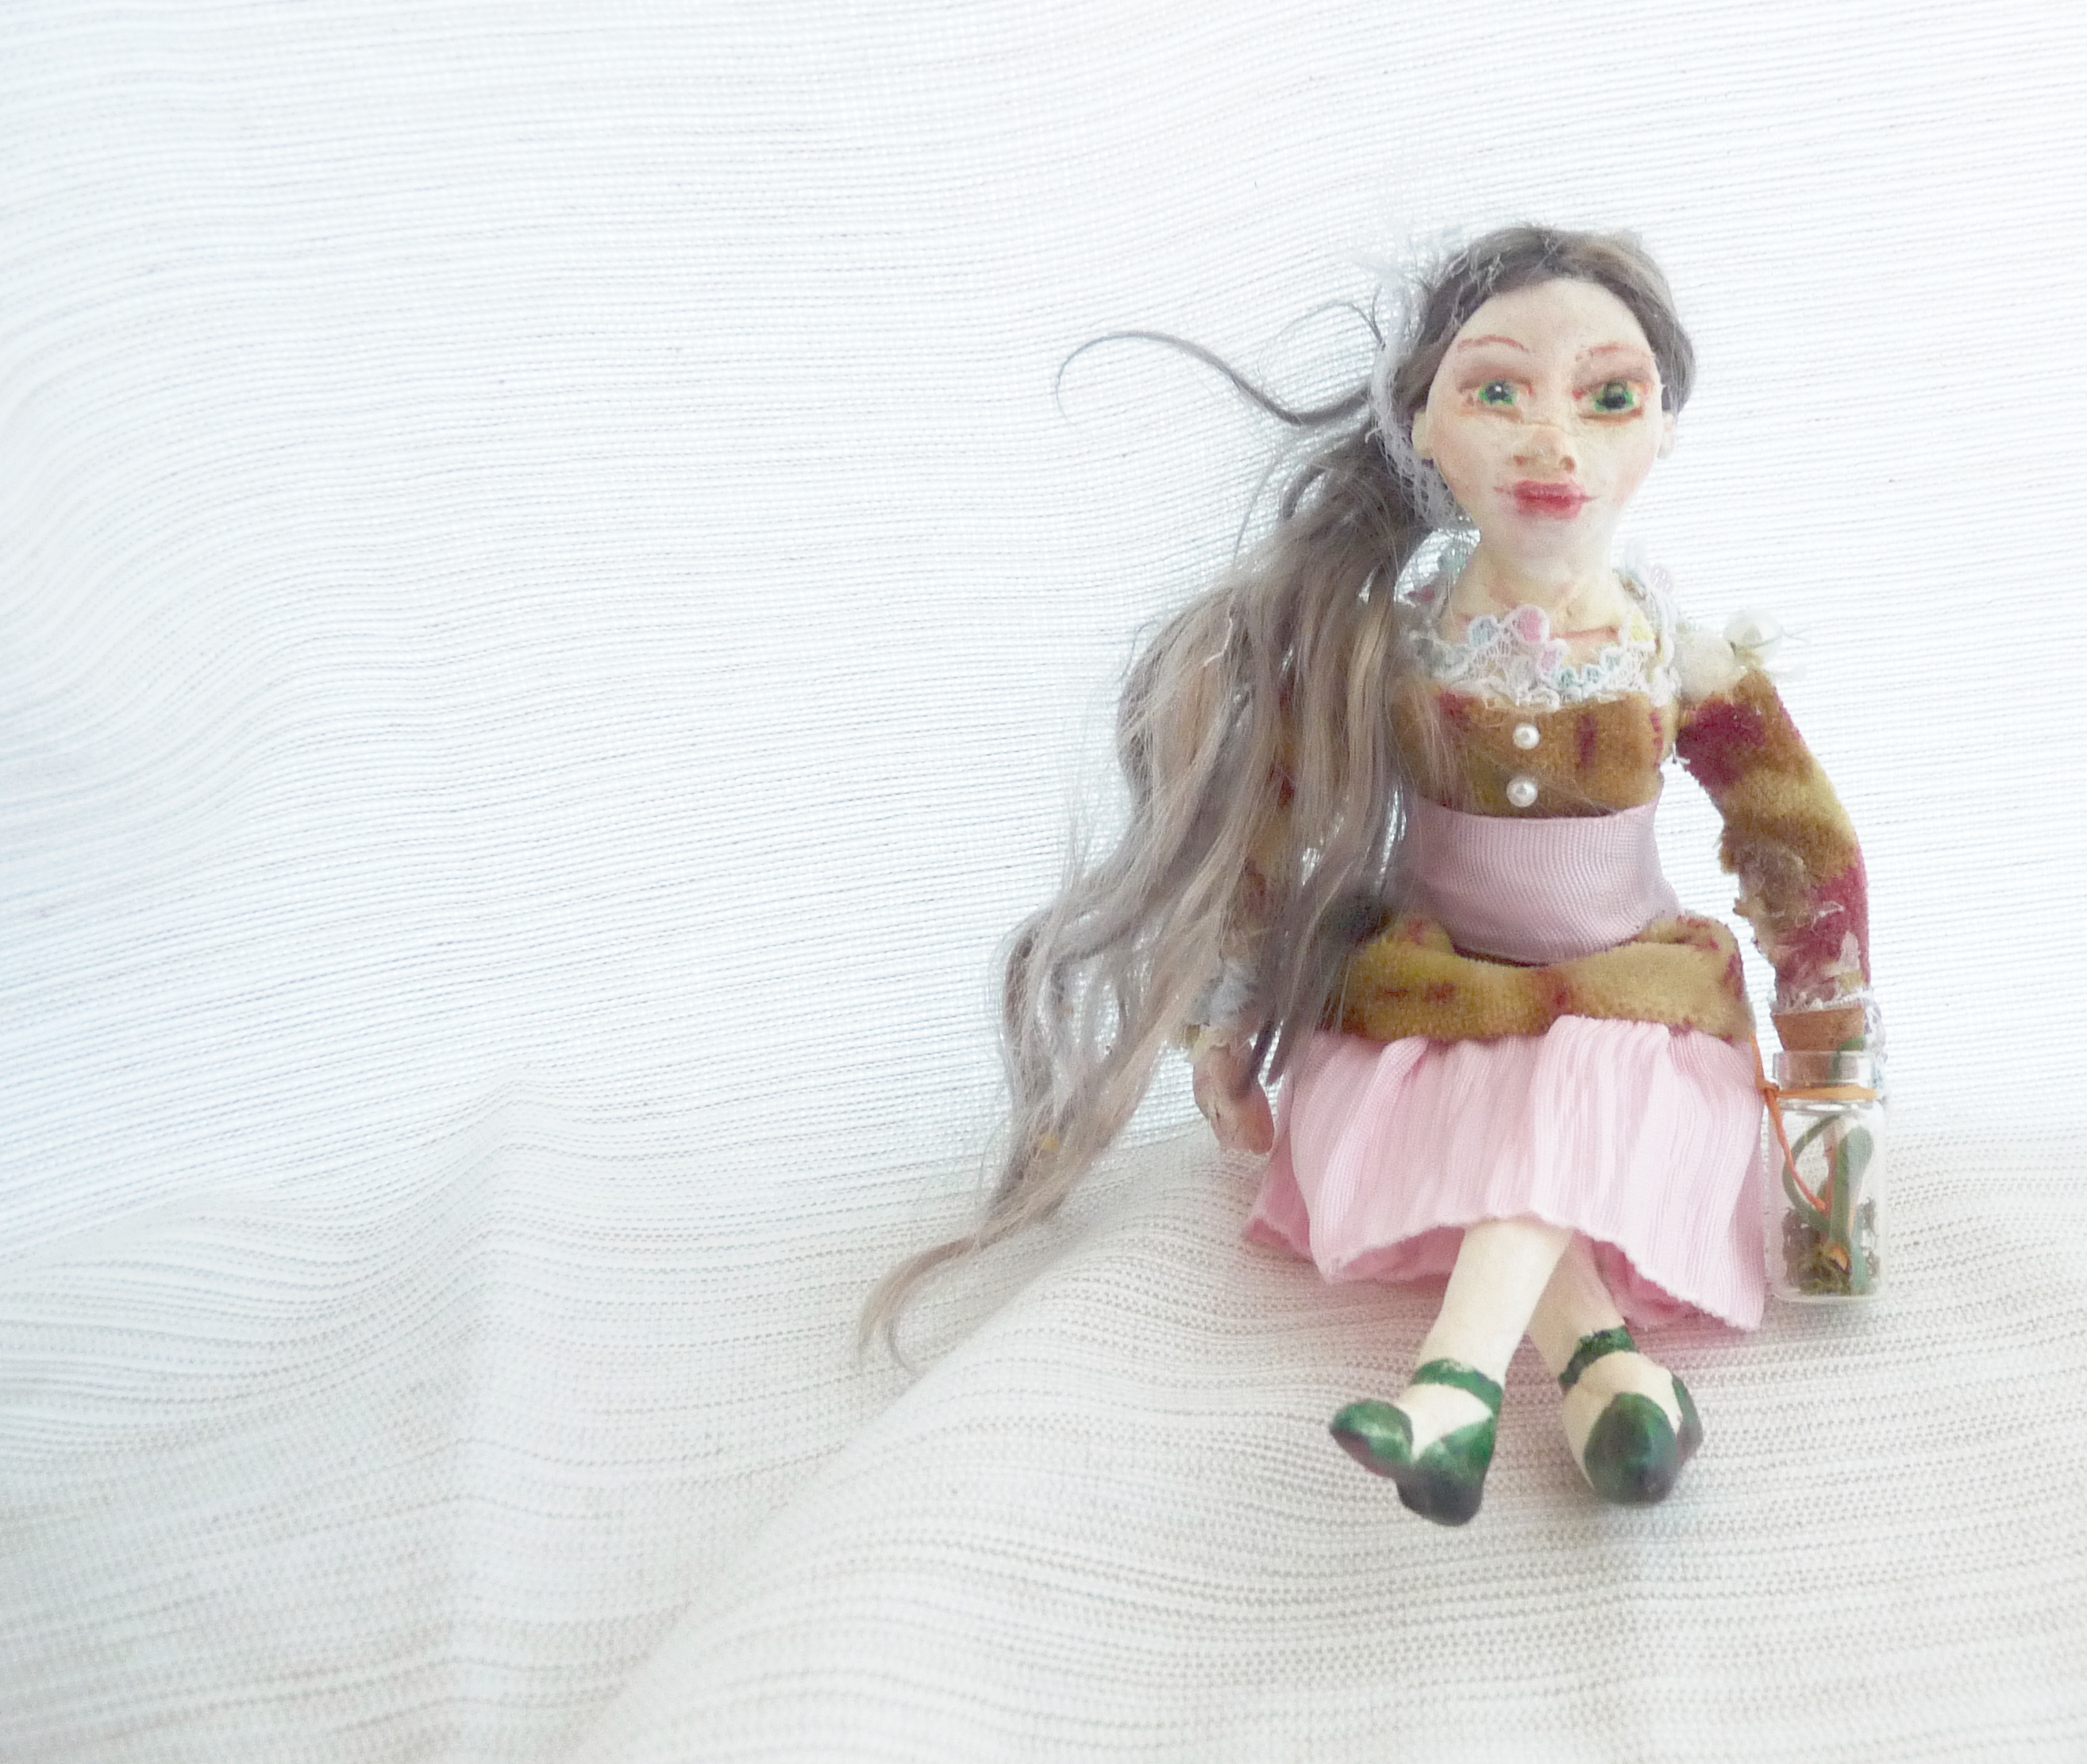
Due to the popularity of my post on sculpting a full-size Paperclay doll, I decided I’d post more dollmaking tutorials. These 5-6 inch mini dolls are fun to make and require only a moderate amount of skill with Paperclay. Thanks to their small size, they also don’t require a large work space or long time commitment, unlike my larger dolls. Don’t let the length of the tutorial intimidate you; you can easily sculpt the body in an hour, and complete each additional step whenever you have a few minutes of free time!
Dollmaking Supplies:
- Wax paper or plastic tablecloth
- Water jar
- Small package of Paperclay (available at most craft stores)
- Simple sculpting tools (available at most craft stores) or ice pick
- Soft cloth
- Sheet of sandpaper
- Small round paintbrush for details, larger flat paintbrush for sanding and sealing
- Watercolors and/or watercolor pencils
- Matte ModgePodge
- Needle and thread
- Four small round beads (with holes large enough for your needle to pass through)
- Low-temp glue gun
- Scissors
- A few strands of yarn, roving, or wool locks (I buy my roving and wool locks on Etsy from stores selling spinning supplies)
- Fabric scraps and trimmings
Step 1: Sculpt the Paperclay Doll Body
First, set up your work space by covering it with your plastic tablecloth or a couple of sheets of wax paper, and laying out your Paperclay, water jar, and sculpting tools. Remove any rings and bracelets before beginning to sculpt, to avoid covering them in Paperclay!
Pinch off a ball of Paperclay about large enough to sit in your palm, and knead it to the correct consistency, adding water a little at a time from your water jar, if necessary. You want your Paperclay to be pliant and slightly “bouncy,” but not so wet that it smears easily.
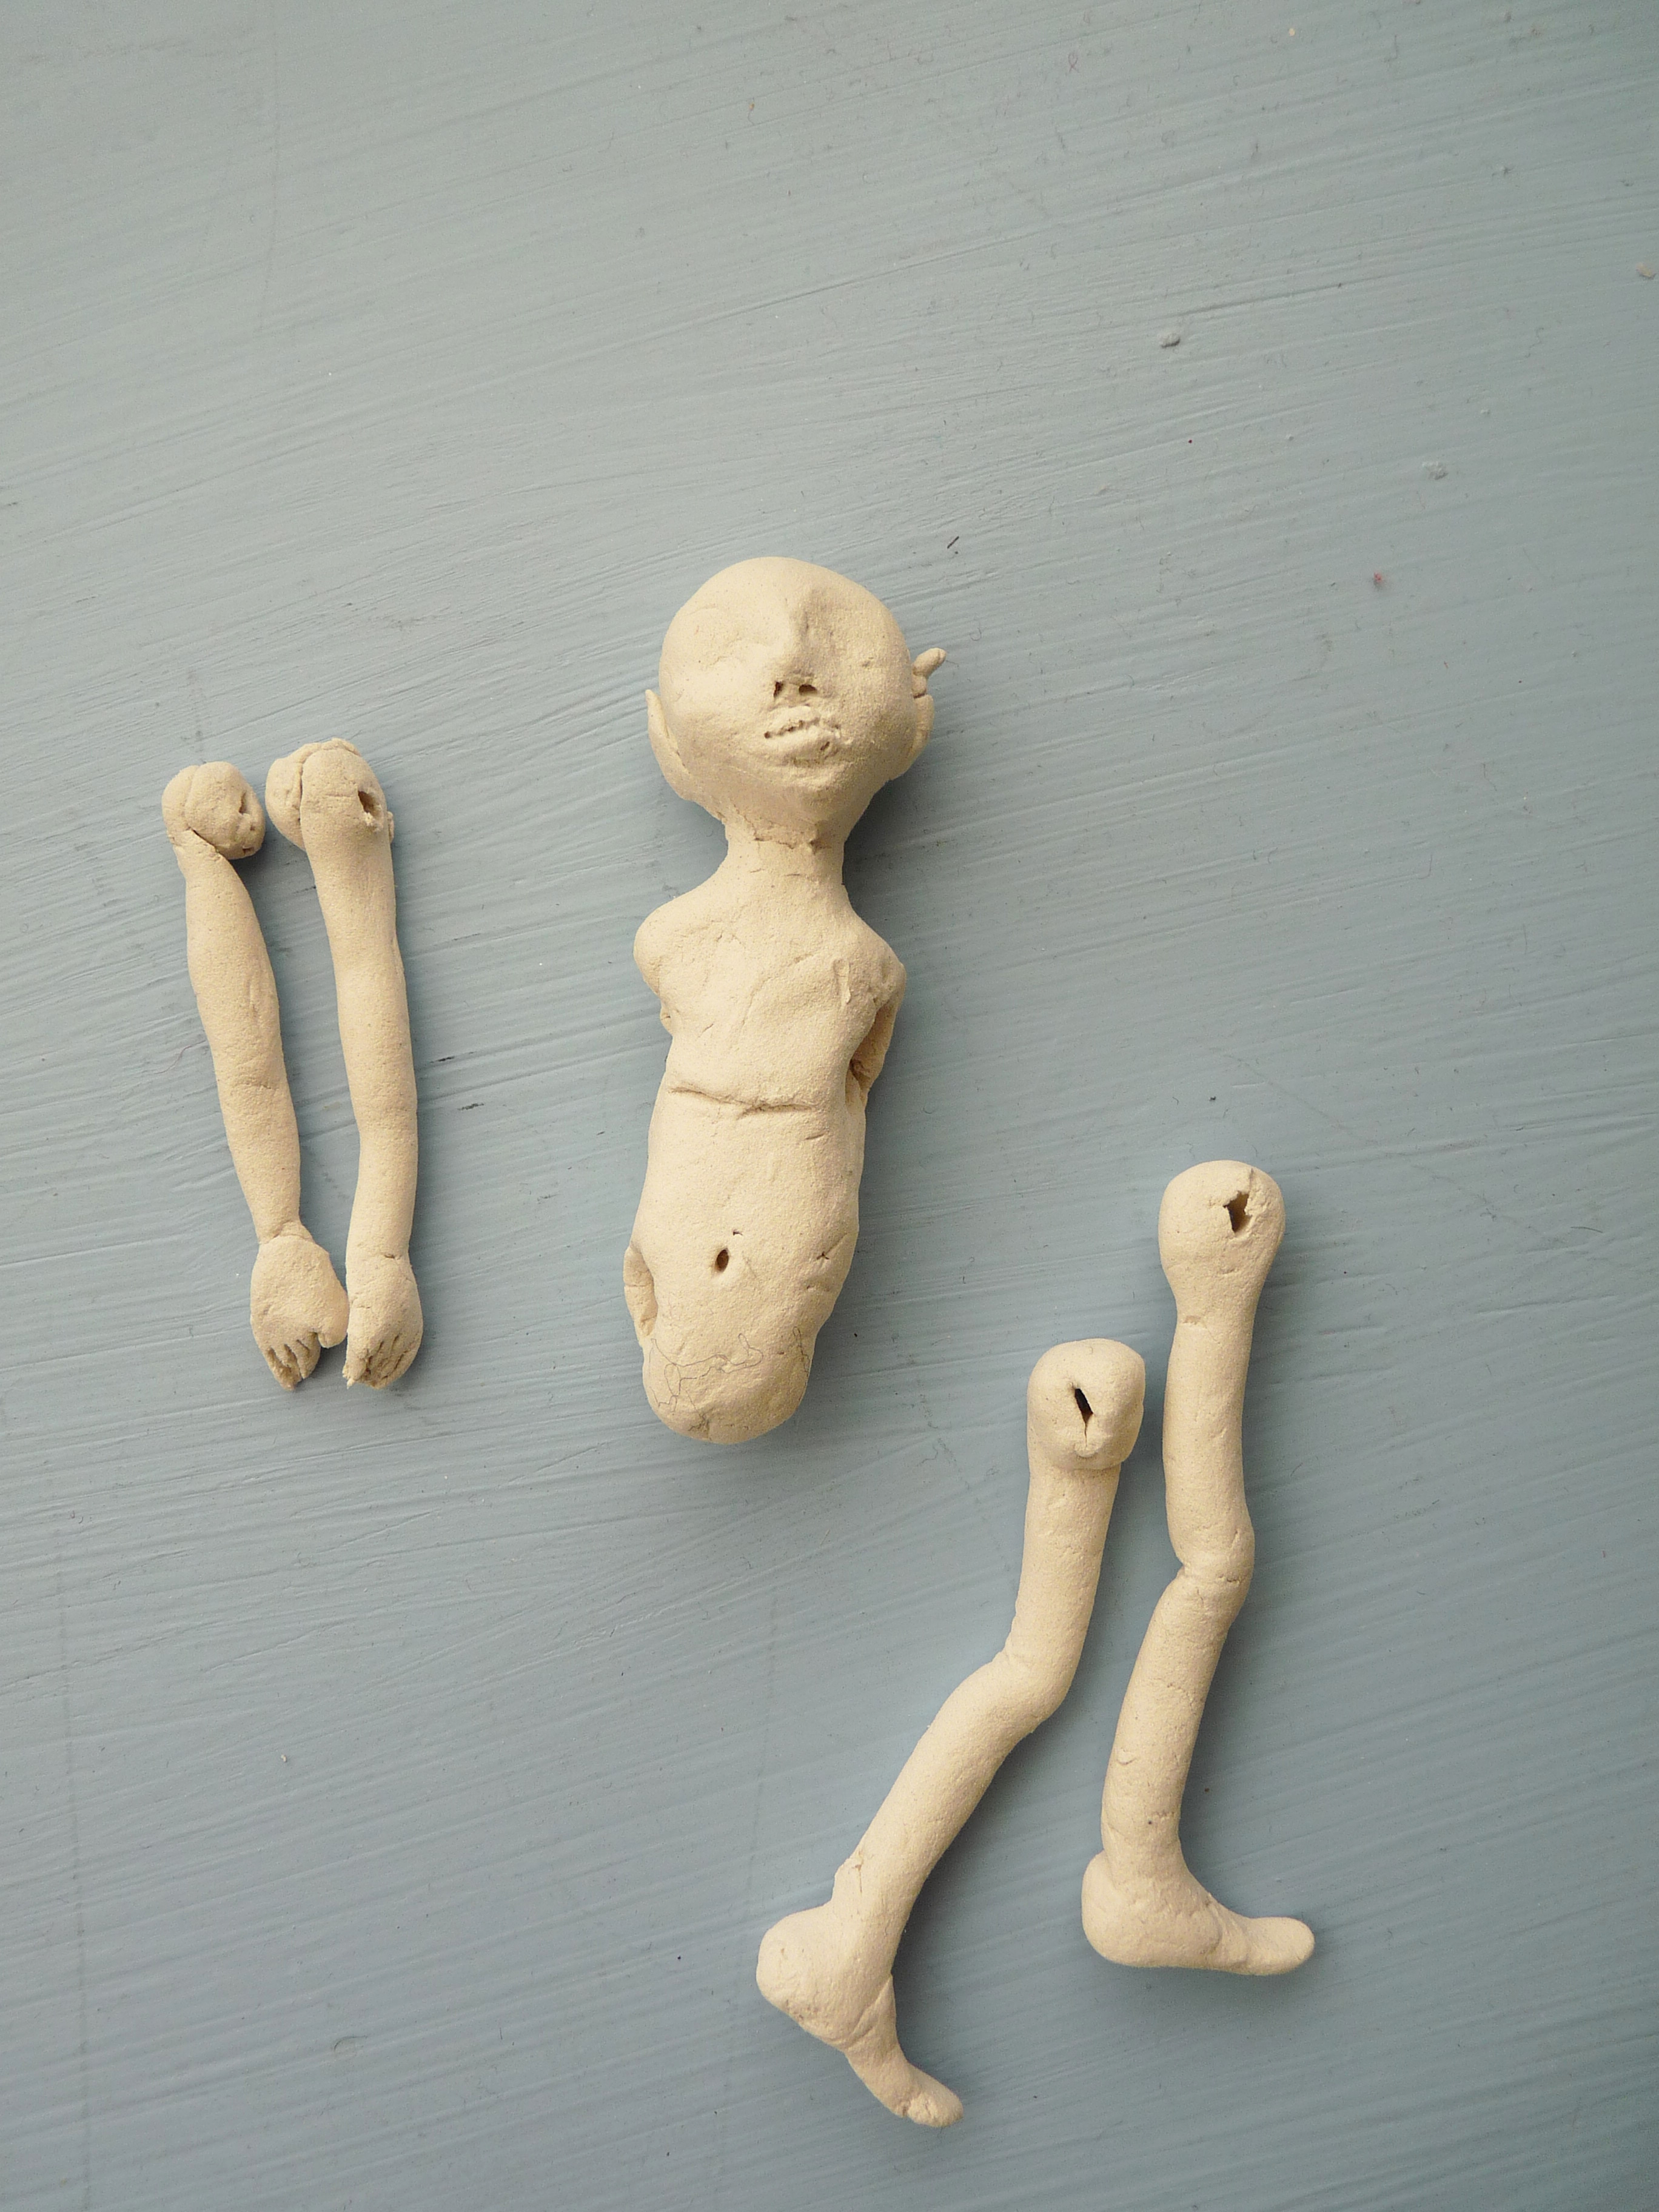
Half your ball. Roll one half into a log shape about 2 1/2 inches long. Add or remove clay if necessary. Pinch the log about 1/3 of the way from the top, using your fingers or your sculpting tools, so that you have a torso and a round head separated by a neck. Be sure not to make your neck too thin, or it will break. Use your hands or sculpting tools to mold your head into an egg shape with a pointed chin, and to give your torso a more human shape. Use your thumbs to give your face indentions where you want your eyes to be (imagine the eye sockets of a skull). This should also give you a slight ridge in between, which will serve as the bridge of your nose.
Use your sculpting tools or ice pick to poke holes through your body, running from shoulder to shoulder and hip to hip. (Refer to the picture below if you are unsure where these should go.) Make these holes large enough for your needle to easily pass through.
Complete your face. Make four tiny balls with Paperclay, each about the size of the head of a pin. Gently set one ball each where you want your eyes, the ball of your nose, and your mouth. Use your thin round metal sculpting tool or your ice pick to press eyelid lines across each of your eyes, poke two nostrils in your nose, and press a smile line through the middle of your mouth. If desired, use a similar process to create ears.
Set your finished torso and head aside, and roll the remainder of your clay into a thin “snake” the width that you want your arms and legs. Pinch off pieces to serve as arms and legs, measuring them against your torso if needed to determine the correct length. Arms should generally be about 2 1/2 inches long, and legs (which need to be long enough to include a foot) 3 – 3 1/2 inches. Create a bump to serve as elbows and knees in each of your arms and legs by slightly folding them in the middle. Flatten one end of each of your arms to create hands. Use your thin metal sculpting tool or ice pick to draw lines to suggest fingers. Bend about 1/4 – 1/2 an inch of each of your legs up to create feet, pinching your “ankle” thinner if needed. Finish your arms and legs by poking holes through the front of your arms at the shoulder, and the sides of your legs at the hip, large enough to pass your needle through. Again, refer to the photo below if you are unsure of the direction to poke the holes.
Allow your finished body to air dry for about two days. Don’t worry if it looks a little rough, as the next step will help with this!
Step 2: Sand, Paint, and Seal your Paperclay Doll Body
When your body is dry, cover your work space again and set out your water jar, larger paintbrush, sandpaper, and soft cloth. Use your sandpaper to gently sand the body, being careful not to press too hard (which could snap the limbs) or sand away your facial features. The sanded Paperclay should have the appearance of white stone. When sanded, use your dry paintbrush to brush the excess clay dust from the body, and then dampen your soft cloth and use it to gently burnish and smooth the body. Allow any parts of the body that became wet to thoroughly dry before moving on.
Tip: If any part of your body breaks during this process, a hot glue gun or superglue can be easily used for repairs.
When you’re ready to paint your body, cover your work space and grab your water jar, small paintbrush, and watercolors. First cover your body with the appropriate flesh tint. It’s generally a good idea to make this a much lighter tone than you think you’ll need to. Then, use a darker tone of your flesh tint to create highlights around your eyelids, mouth, cheeks and chin, elbows and knees, hands, and feet. To paint your eyes, first paint the entire eye white, then, when dry, add a colored iris, and then, once dry, a smaller black pupil. To finish, dot your pupil with a tiny white highlight. Add thin lines for eyebrows, and darken your lips to the desired shade. Finally, paint shoes onto the feet of your doll. Some might find it easier to use watercolor pencils for these details.
Allow your doll to thoroughly dry before bringing out your matte ModgePodge and larger paintbrush. Gently cover your doll in a thin layer of ModgePodge, being careful not to let the ModgePodge collect in the creases of your doll’s face and fingers. Unless you water down your ModgePodge or use a wet brush, this should not smear your paint.
Allow the doll to dry again before moving on.
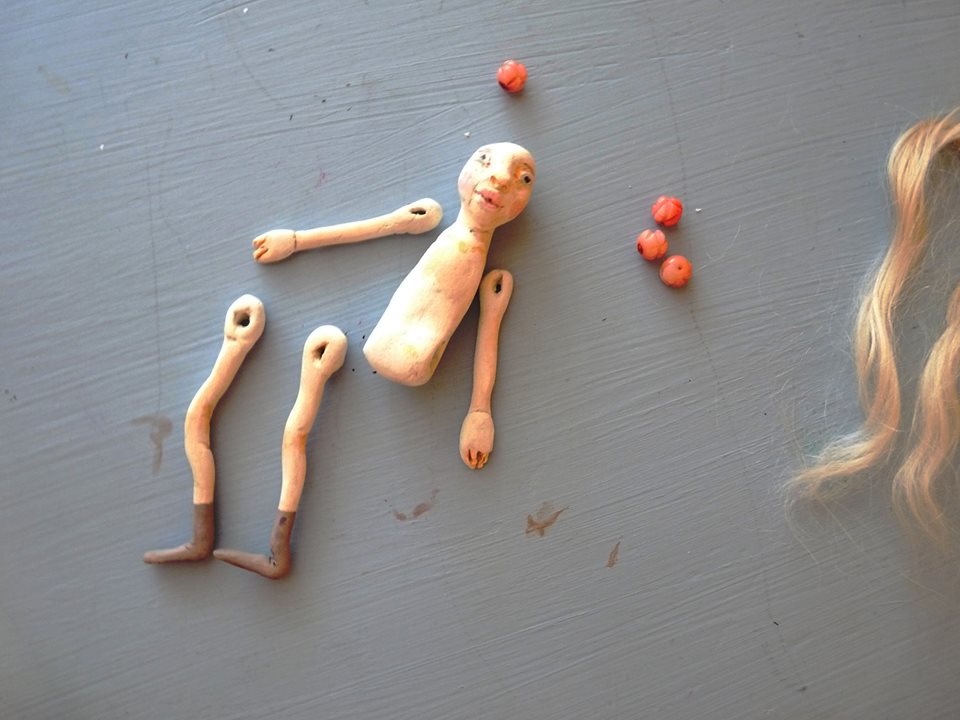
Step 3: String your Doll’s Body
When you’re ready to string your doll’s body, you’ll need the doll, a needle and thread in a color to match the doll’s skin tone, and your four beads. To attach the doll’s arms, first string one of the beads onto your needle and thread, and knot your thread around the bead to keep it from slipping. String your first arm onto the thread, and push it down against the bead. Then, pass your needle and thread through the doll’s body, pulling the arm tight against the shoulder. On the other side, string on the second arm, pushing it down tight against the shoulder, and then the second bead, pushing it down against the arm. Pass your needle back through the second arm, the body, the first arm, and the first bead, repeating as many times as necessary for you to feel that the limbs are secure, before knotting off your thread. If your limbs are a little loose, this is fine, as it will give them more freedom of movement. Repeat the same steps to string your doll’s legs.
Step 4: Dress your Doll
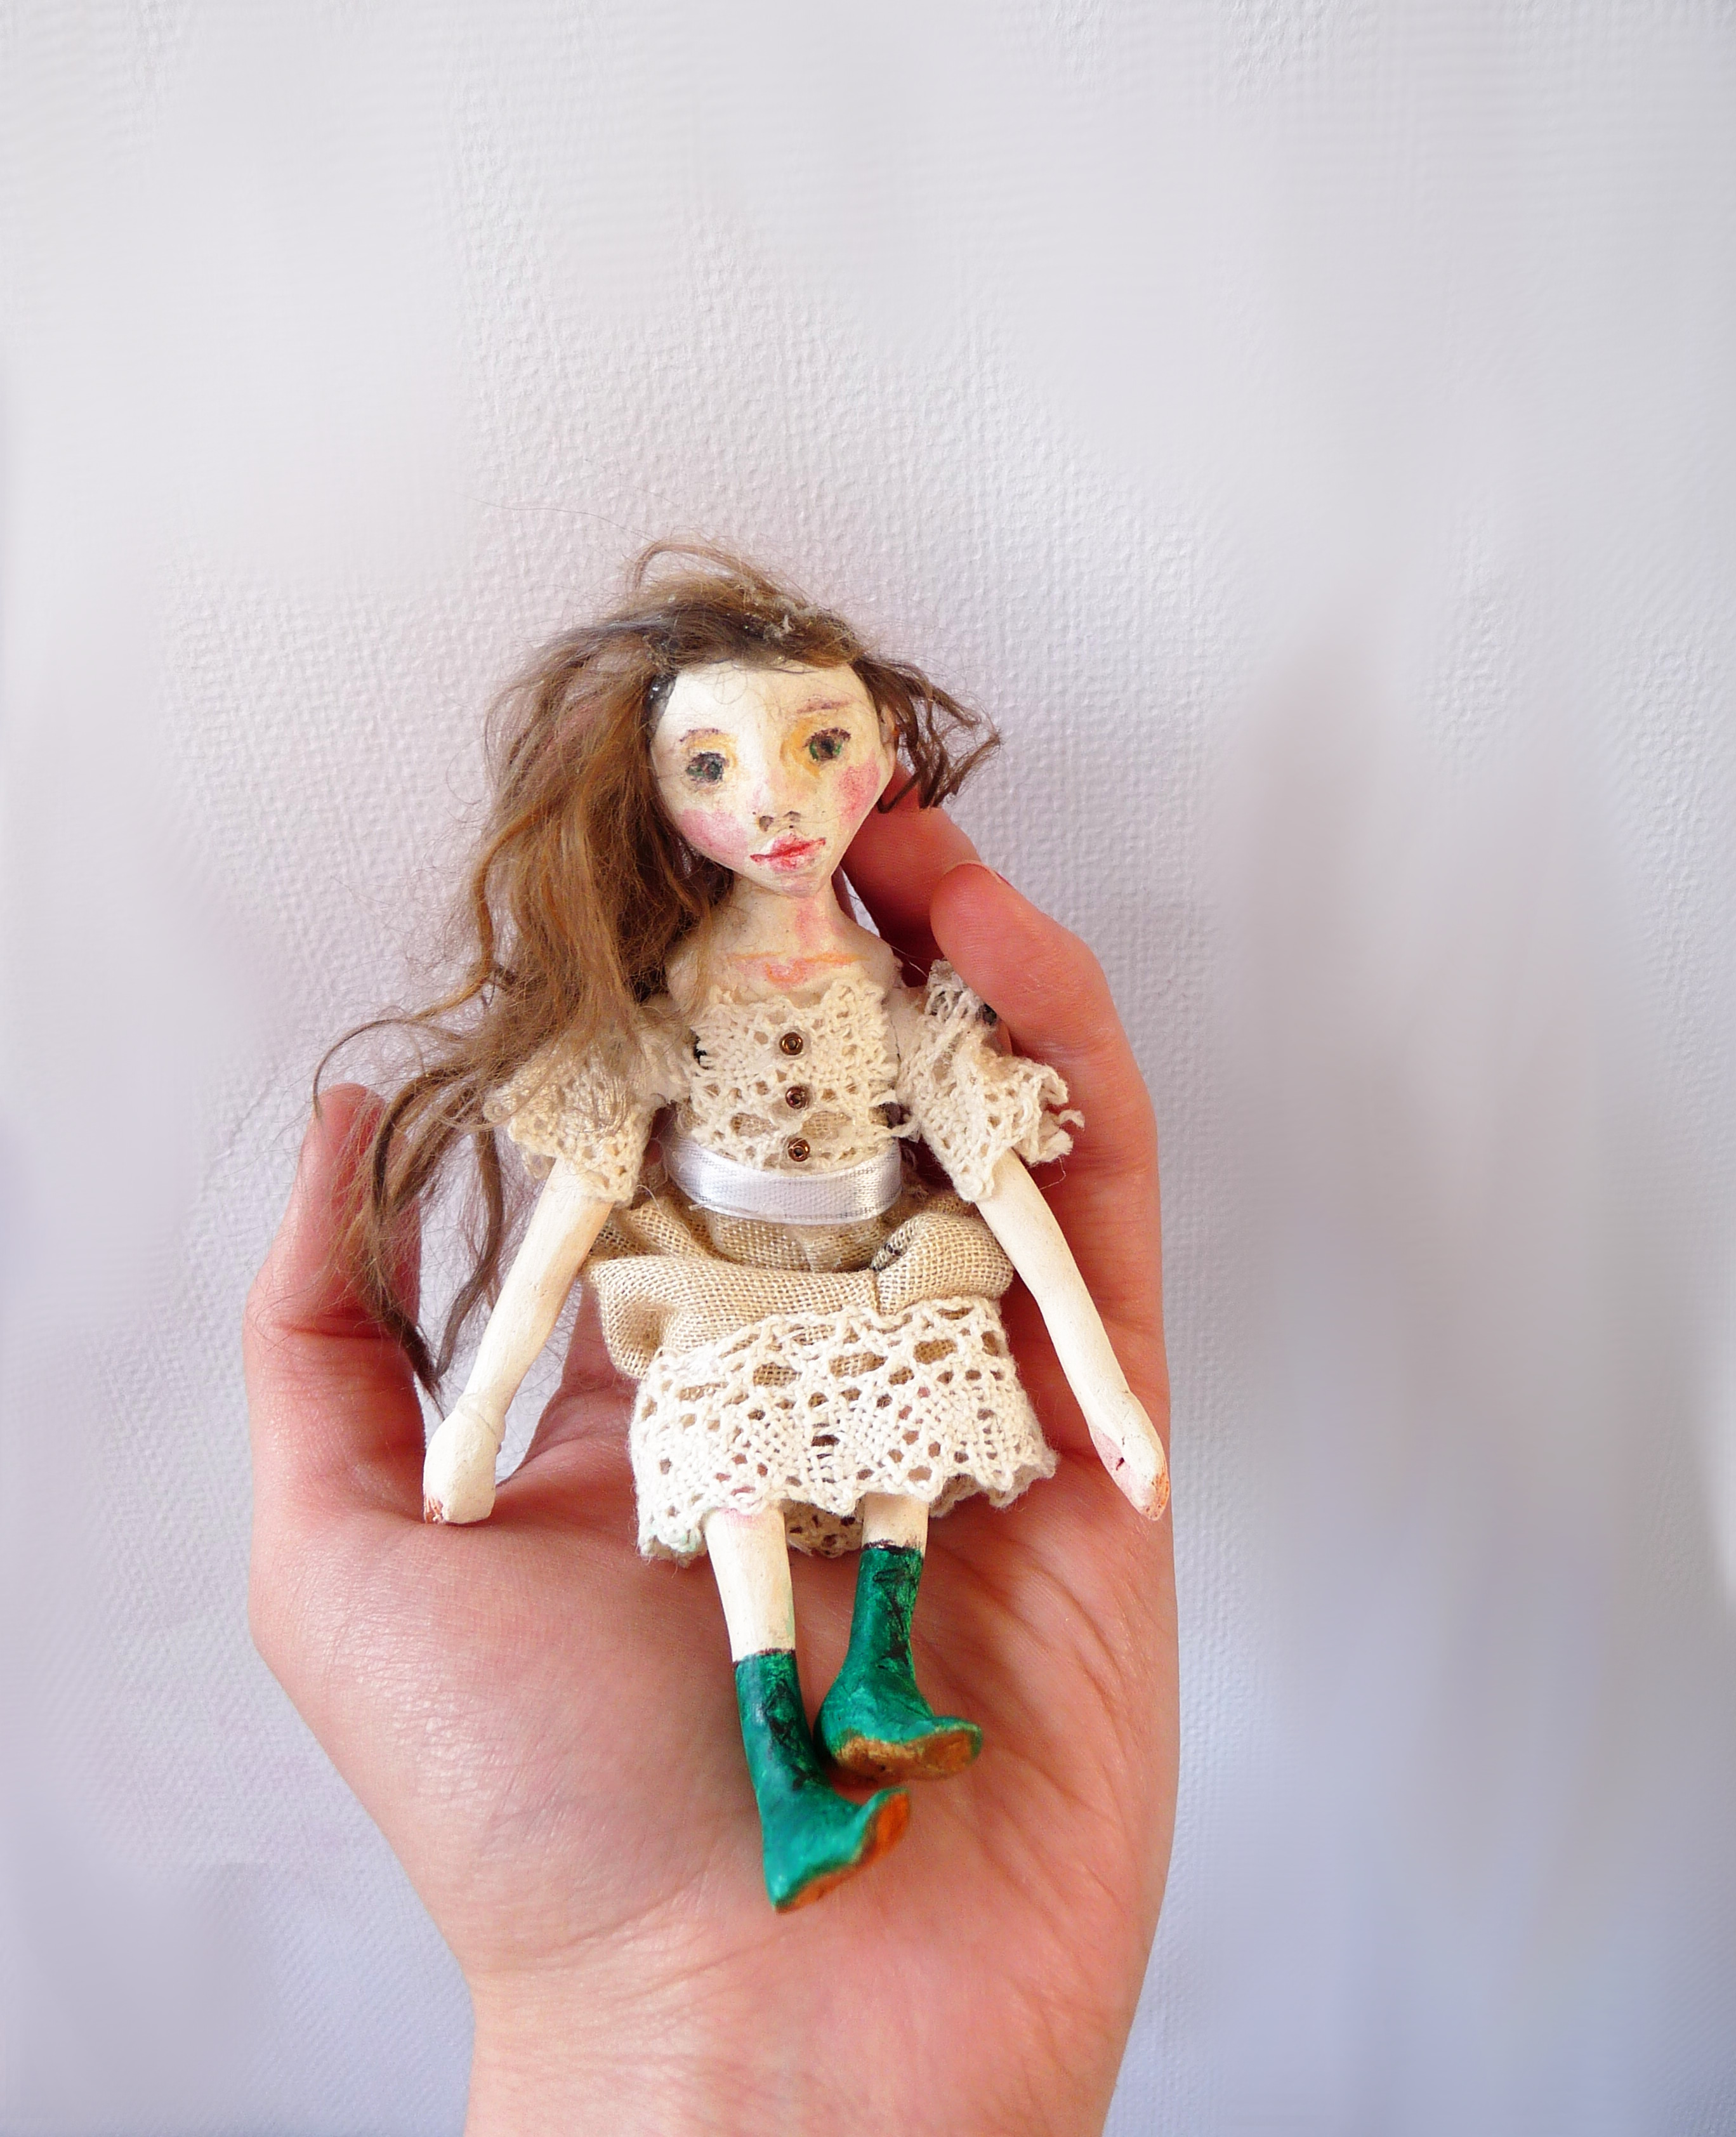
Gather up your doll, the materials you’re using for your doll’s hair and clothing, scissors, needle and thread (if desired) and your glue gun. Plug in your glue gun and allow it to warm up. While you’re waiting, plan out how you’ll arrange your doll’s hair, and trim it to a uniform length. Dolls of this size generally need only a few strands of yarn or mohair. Use your glue gun to attach the hair, folding the strands in half and attaching the fold to the doll’s scalp for a more natural look.
Use your cloth scraps and trimmings to dress your doll. This can be done entirely with your glue gun, gluing the clothing directly to the doll, or you can use a needle and thread to sew the outfit first if you like.
To create a dress similar to what’s shown in the picture below, you will need: fabric scraps, about a quarter yard of thin lace, a short length of ribbon, and a few tiny seed beads. Cut a piece of cloth the correct size to sew a skirt, and cut a length of lace the width of the skirt. Sew your lace to the bottom of the skirt, then fold the skirt over with the outside showing, and sew up the open side to form a tube. Turn your skirt inside out and put it on your doll, using hot glue to secure it at the doll’s waist. Create gathers by folding at the waist if desired. Cut another length of fabric twice the length of your doll’s upper torso and the right length to wrap around it. Fold the cloth in half, and using hot glue to secure it to the doll, wrap it around the doll’s torso, creating the dress’s bodice. For sleeves, cut two more pieces of cloth the correct length and width to wrap around your doll’s arms, and secure with hot glue. Add lace at the bottom for cuffs. Cut a length of ribbon the right length to wrap around your doll’s torso, and secure it with hot glue, using it to hide the join between the skirt and bodice. Finish the dress by gluing a line of seed beads down the front for buttons.
For more dollmaking and crafting tutorials, visit the tutorial section of my blog.

Pingback: Flora and Fauna – The Free Folk
Pingback: Four Little Handmade Halloween Witches – The Free Folk
Pingback: Three New Miniature Art Dolls: Miss Emily, Agnes, and Beau – The Free Folk